Updated 22 October 2024
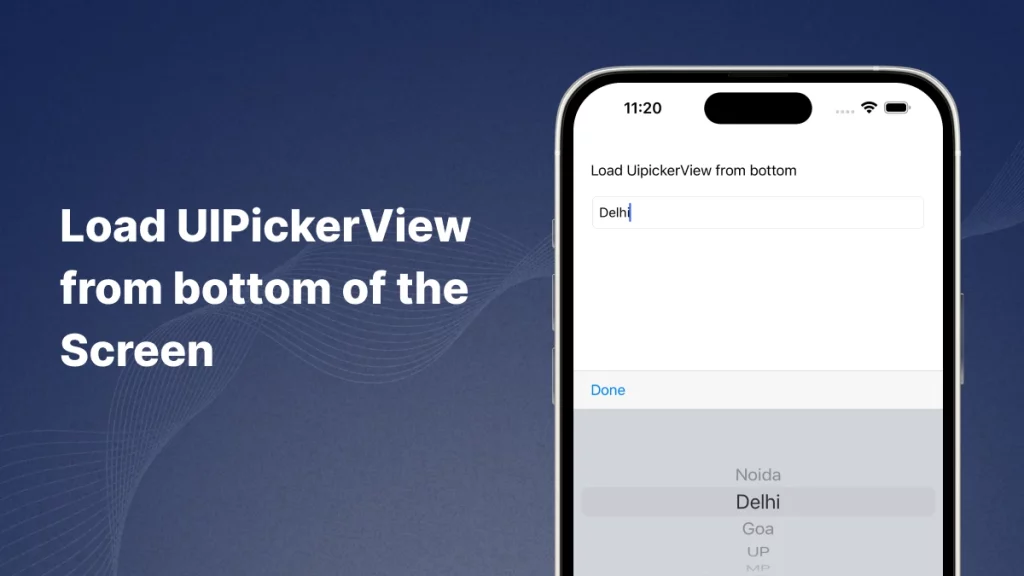
In this article you will learn about How To Load UIpicketView From Bottom Of The Screen in Swift.
UIPickerView is a user interface element in iOS that allows users to choose a value from a list of options.
It’s similar to a dropdown or a scrolling list and is often used in scenarios like selecting a date, time.

In Swift UIPickerView is a user interface component from the UIKit framework that presents a rotating scrollable list of items from which users can select.
It functions like a wheel with rows of options, UIPickerView can display single or multiple columns.
A picker can have more than one column (component), each providing different options. For example, a date picker might have separate columns for day, month, and year.
You can check here for more information about UIPickerView
We need to follow below mention steps to implement Load UIPickerView From Bottom Of TheScreen.
First of all we need to create a new project where you will integrate UIPickerView.
After that we need to add a UITextField either programatically or using Storyboard.
|
1 |
@IBOutlet weak var textfield: UITextField! |
In this steps you need to create a PickerView.
This Swift function createPickerView() sets up a UIPickerView as the input method for a UITextField, replacing the default keyboard with the picker.
After that we need to create a dismissPickerView.
|
1 2 3 4 5 6 7 8 |
func dismissPickerView() { let toolBar = UIToolbar() toolBar.sizeToFit() let button = UIBarButtonItem(title: "Done", style: .plain, target: self, action: #selector(self.action)) toolBar.setItems([button], animated: true) toolBar.isUserInteractionEnabled = true textfield.inputAccessoryView = toolBar } |
dismissPickerView() is function creates a toolbar with a “Done” button that allows users to dismiss the UIPickerView when they are done selecting a value.
|
1 2 3 |
func numberOfComponents(in pickerView: UIPickerView) -> Int { 1 } |
The function numberOfComponents specifies that the UIPickerView will have one component or column.
|
1 2 3 |
func pickerView(_ pickerView: UIPickerView, numberOfRowsInComponent component: Int) -> Int { 10 } |
The function pickerView(_:numberOfRowsInComponent:) returns the number of rows (or items) in the specified component (column) of the UIPickerView.
|
1 2 3 |
func pickerView(_ pickerView: UIPickerView, titleForRow row: Int, forComponent component: Int) -> String? { return countryList[row] // dropdown item } |
The function pickerView(_:titleForRow:forComponent:) provides the text for each row in the UIPickerView. In this code, it returns the item from the countryList array corresponding to the row’s index
|
1 2 3 4 |
func pickerView(_ pickerView: UIPickerView, didSelectRow row: Int, inComponent component: Int) { selectedCountry = countryList[row] // selected item textfield.text = selectedCountry } |
The function pickerView(_:didSelectRow:inComponent:) is called when a row is selected in the UIPickerView.
In this code, when a user selects a row, it assigns the selected country from the countryList array to the selectedCountry variable.
Then, it updates the textfield.text to display the selected country.
|
1 2 3 4 5 6 7 8 9 10 11 12 13 14 15 16 17 18 19 20 21 22 23 24 25 26 27 28 29 30 31 32 33 34 35 36 37 38 39 40 41 42 43 44 45 46 47 48 49 |
import UIKit class ViewController: UIViewController,UIPickerViewDelegate,UIPickerViewDataSource, UITextFieldDelegate { var selectedCountry: String? var countryList = ["Noida","Delhi","Goa","UP","MP","Andhra Pradesh","Arunachal Pradesh","Haryana","Jharkhand","Karnataka"]; @IBOutlet weak var textfield: UITextField! override func viewDidLoad() { super.viewDidLoad() // Do any additional setup after loading the view. createPickerView() dismissPickerView() } func createPickerView() { let pickerView = UIPickerView() pickerView.delegate = self textfield.inputView = pickerView } func dismissPickerView() { let toolBar = UIToolbar() toolBar.sizeToFit() let button = UIBarButtonItem(title: "Done", style: .plain, target: self, action: #selector(self.action)) toolBar.setItems([button], animated: true) toolBar.isUserInteractionEnabled = true textfield.inputAccessoryView = toolBar } @objc func action() { view.endEditing(true) } func numberOfComponents(in pickerView: UIPickerView) -> Int { 1 } func pickerView(_ pickerView: UIPickerView, numberOfRowsInComponent component: Int) -> Int { 10 } func pickerView(_ pickerView: UIPickerView, titleForRow row: Int, forComponent component: Int) -> String? { return countryList[row] // dropdown item } func pickerView(_ pickerView: UIPickerView, didSelectRow row: Int, inComponent component: Int) { selectedCountry = countryList[row] // selected item textfield.text = selectedCountry } } |
UIPickerView is a user interface element in iOS that allows users to choose a value from a list of options
In this article we have discussed about Load UIPickerView From Bottom Of The Screen.
Hope this blog is helpful to understand this topic.
Thanks for reading this blog. You can also check other blogs from here for more knowledge.
If you have more details or questions, you can reply to the received confirmation email.
Back to Home
Be the first to comment.