Hello readers, today in our swift learning journey we will discuss another interesting topic of Swift “UIPickerView”.

In Swift, UIPickerView is a fundamental user interface component in iOS development that allows users to make selections from a set of options presented in a scrollable, column-based view. The UIPIckerView in Swift is commonly used when you want to provide users with the options to select from the list.
Prerequisites
Before we dive into the UIPickerView in Swift, you must have a basic understanding of iOS development using Swift and Xcode. Assuming that you are familiar with setting up user interfaces and handling basic interactions in iOS apps we will directly learn about the UIPickerView integration.
Step 1: Setting Up the UIPickerView
Firstly, we need to set up the Picker View on our UIViewController and make the connection to our ViewController class.

Step2: Extends the Delegates of UIPickerView
Next, we will extend the delegates of the Picker View and implement its functions on our ViewController.
|
1 2 3 4 5 6 7 8 9 10 11 12 13 14 15 16 17 18 19 20 21 |
import UIKit class ViewController: UIViewController, UIPickerViewDataSource, UIPickerViewDelegate { @IBOutlet weak var pickerView: UIPickerView! @IBOutlet weak var selectedLabel: UILabel! func numberOfComponents(in pickerView: UIPickerView) -> Int { // return the int value indicating the total number of columns in the picker view } func pickerView(_ pickerView: UIPickerView, numberOfRowsInComponent component: Int) -> Int { // return the int value indicating the total number of rows in each column of the picker view } func pickerView(_ pickerView: UIPickerView, titleForRow row: Int, forComponent component: Int) -> String? { //return the string indicating the title on the respective components of the rows. } } |
In UIPickerView, we can create multiple scrollable picker views that work autonomously for every section. With some appropriate logic, you can access their data and use it individually for different purposes.
Step 3: Displaying the UIAlertController
Once you integrate the methods and add the logic accordingly, you can then provide the self to the picker view delegates to present the view on your UIViewController.
|
1 2 |
pickerView.delegate = self pickerView.dataSource = self |
Example Code
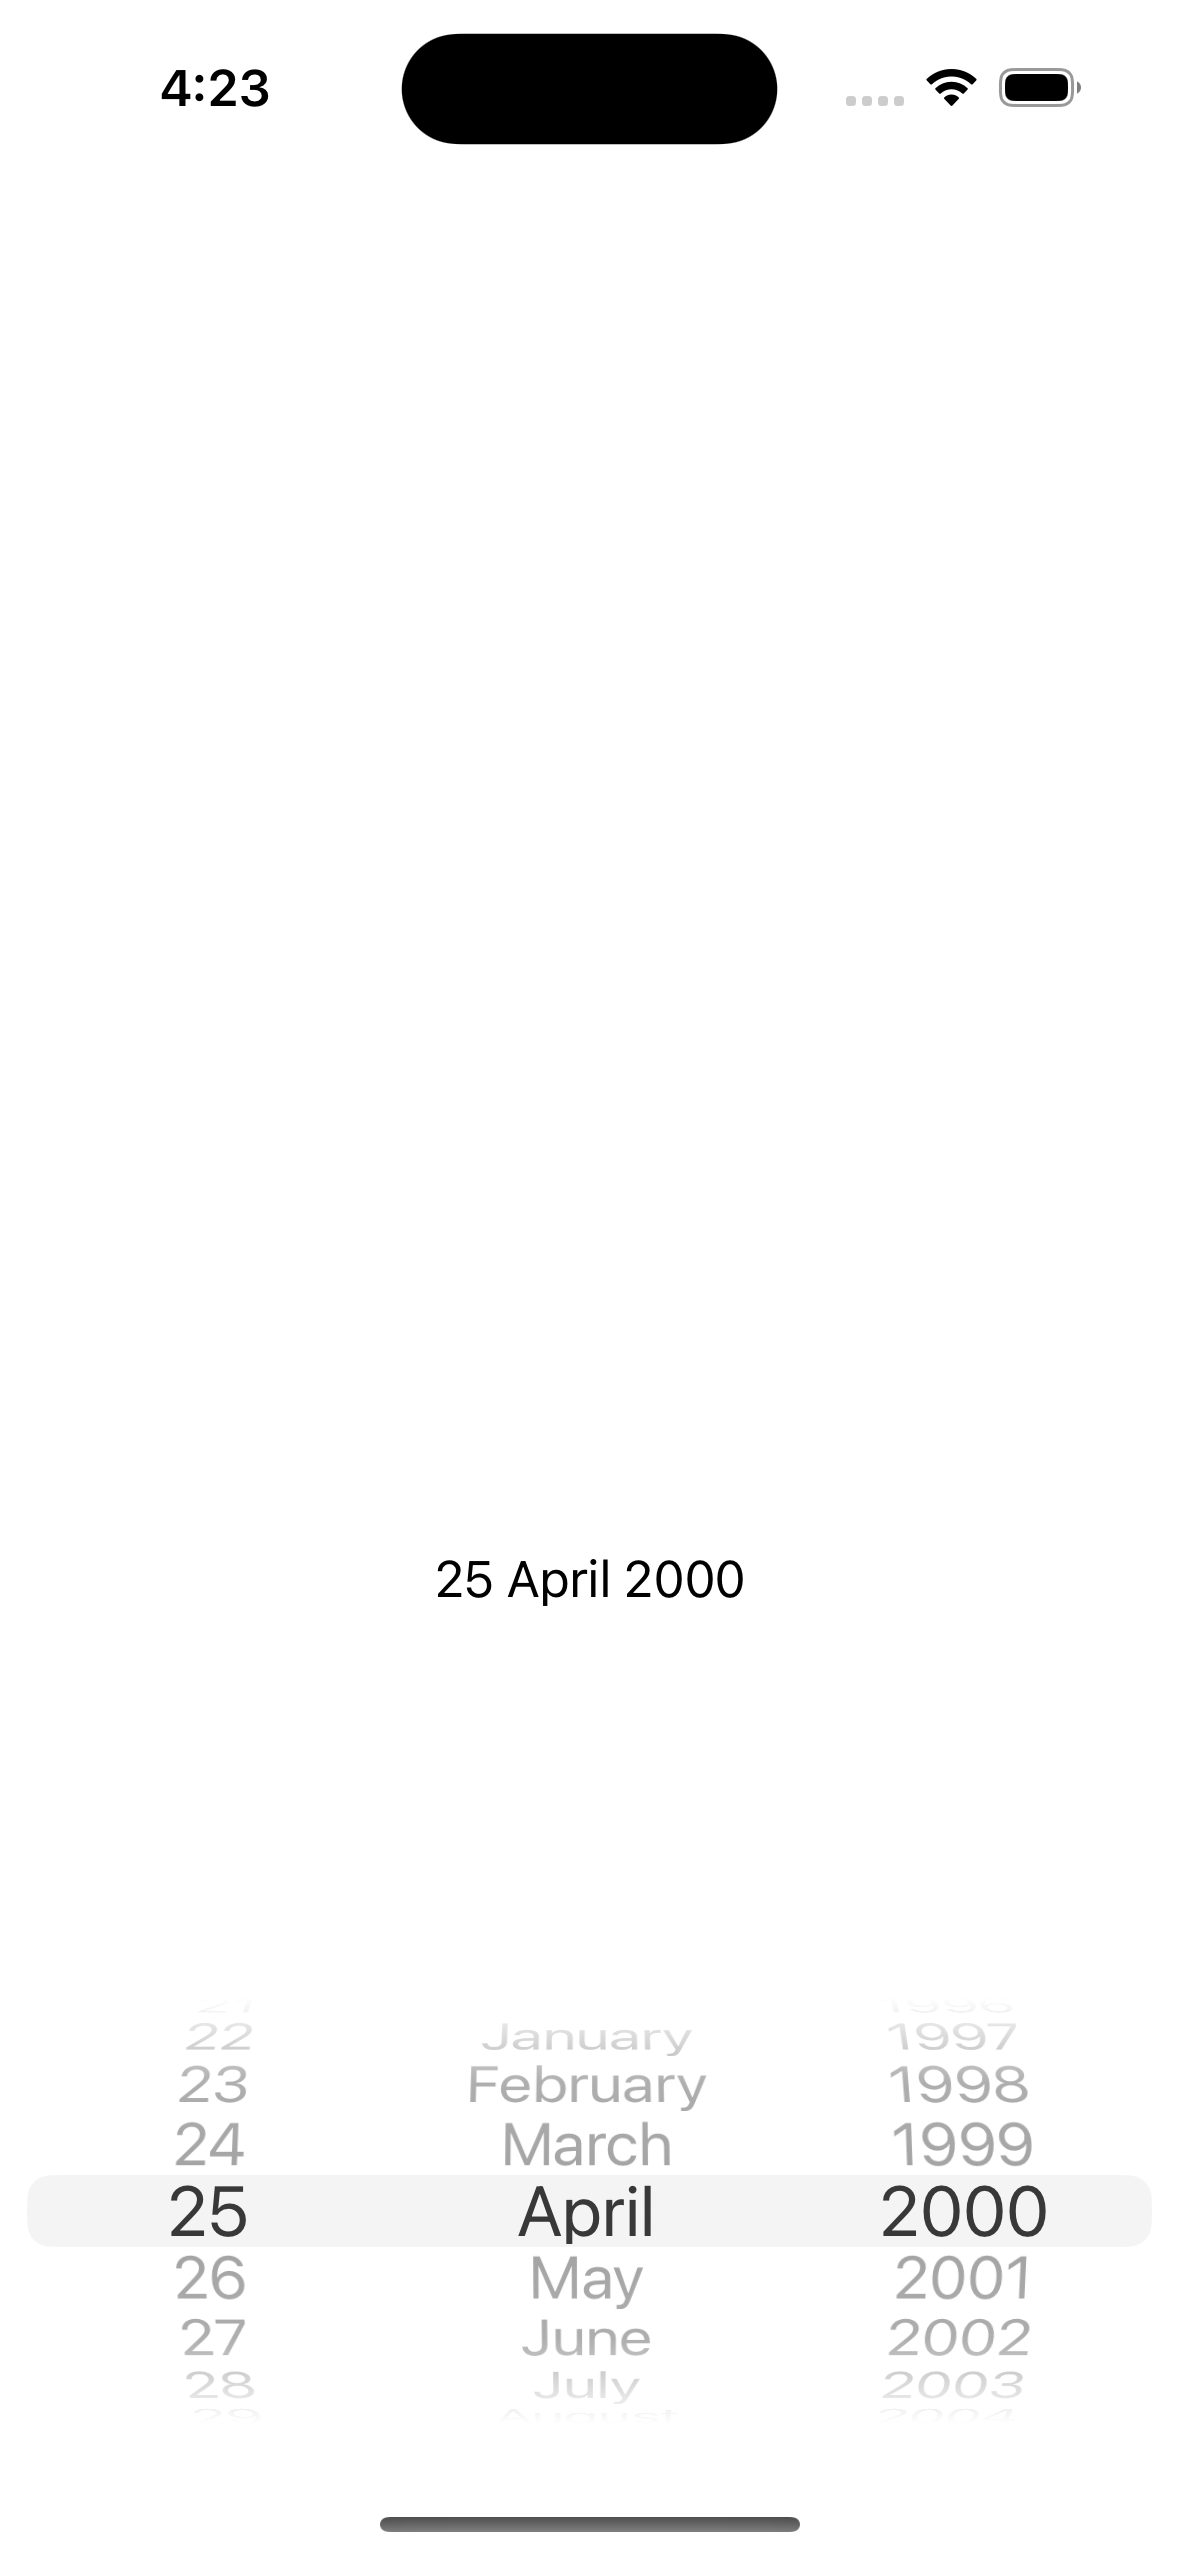
Here is the example code where we have created a date picker containing the 3 components and displaying the selected date on the label.
|
1 2 3 4 5 6 7 8 9 10 11 12 13 14 15 16 17 18 19 20 21 22 23 24 25 26 27 28 29 30 31 32 33 34 35 36 37 38 39 40 41 42 43 44 45 46 47 48 49 50 51 52 53 54 55 56 57 58 59 60 61 62 63 64 65 66 |
import UIKit class ViewController: UIViewController, UIPickerViewDataSource, UIPickerViewDelegate { @IBOutlet weak var pickerView: UIPickerView! @IBOutlet weak var selectedLabel: UILabel! let days = Array(1...31) let months = ["January", "February", "March", "April", "May", "June", "July", "August", "September", "October", "November", "December"] let years = Array(1990...2024) override func viewDidLoad() { super.viewDidLoad() pickerView.delegate = self pickerView.dataSource = self selectedLabel.isHidden = true } func numberOfComponents(in pickerView: UIPickerView) -> Int { return 3 // Number of components in the picker (e.g., sections) } func pickerView(_ pickerView: UIPickerView, numberOfRowsInComponent component: Int) -> Int { switch component { case 0: return days.count case 1: return months.count case 2: return years.count default: return 0 } } func pickerView(_ pickerView: UIPickerView, titleForRow row: Int, forComponent component: Int) -> String? { switch component { case 0: return "\(days[row])" case 1: return months[row] case 2: return "\(years[row])" default: return "" } } func pickerView(_ pickerView: UIPickerView, didSelectRow row: Int, inComponent component: Int) { let day = days[pickerView.selectedRow(inComponent: 0)] let month = months[pickerView.selectedRow(inComponent: 1)] let year = years[pickerView.selectedRow(inComponent: 2)] selectedLabel.text = "\(day) \(month) \(year)" selectedLabel.isHidden = false // Handle selection if needed } func pickerView(_ pickerView: UIPickerView, rowHeightForComponent component: Int) -> CGFloat { return 22 } } |
Output:-
Here is the output of the above code.
Conclusion
In this blog, we learned about the UIPickerView its delegates, functions and use cases. We have also created an example app for date pickers through the Picker View.
You can continue your learning journey with us through our Mobikul Blogs.
Additionally you can also checkout our Flutter App Development Services here.

Be the first to comment.