What is Socket.io
Socket.io is a library that enables event-based communication between client to server
Implementation
1. You have to write the below line in your point and in your terminal run the command pod install
|
1 |
pod 'Socket.IO-Client-Swift', '~> 12.1.3' |
This will help you to integrate the real-time chat
2. Import the library for this library where you want to use it
|
1 |
import SocketIO |
3. Create a class to perform the event for the chat system like below.
|
1 2 |
class SocketIOManager: NSObject { static let sharedInstance = SocketIOManager() |
4. Add the socket url or port url in this Class using below code.
|
1 |
var socket: SocketIOClient = SocketIOClient(socketURL: NSURL(string: "Your server link will here")! as URL) |
5. Initiate the class and start or connect the server.
|
1 2 3 4 5 6 |
override init() { super.init() socket.on(clientEvent: .connect){data,ack in print(data) } } |
in the above line of code socket.on it will not connect to the server it is an event when the server will connect the data will print
6. please create function, and within the function, you connect the server from the app
if you are using function, you can use this code from anywhere else
|
1 2 3 4 |
func establishConnection() { print("Socket connected") socket.connect() } |
If you want to connect the server on the app startup you need to connect the server from the appdelegate class
Please check the below code to connect the server from the appDelagate
|
1 2 3 4 5 6 |
// in dididFinishLaunchingWithOptions Timer.scheduledTimer(timeInterval: 20.0, target: self, selector: #selector(socketConnection), userInfo: nil, repeats: true) @objc func socketConnection() { SocketIOManager.sharedInstance.establishConnection() } |
7. If you want to close the connection or reconnect the server please follow the below link
|
1 2 3 4 5 6 7 8 |
func closeConnection() { print("Socket disconnected") socket.disconnect() } func reconnection() { socket.reconnect() } |
8. Please add the event to recieve the message from other end
|
1 2 3 4 |
socket.on("seller new message received") { dataArray, ack in print("seller new message received \(dataArray)") NotificationCenter.default.post(name: .receiveMsgFromSocket, object: nil, userInfo: JSON(dataArray[0]).dictionaryObject) } |
In the above code there is a notificationcenter.default.post this will help you to fatch the received data and reload the message in the controller
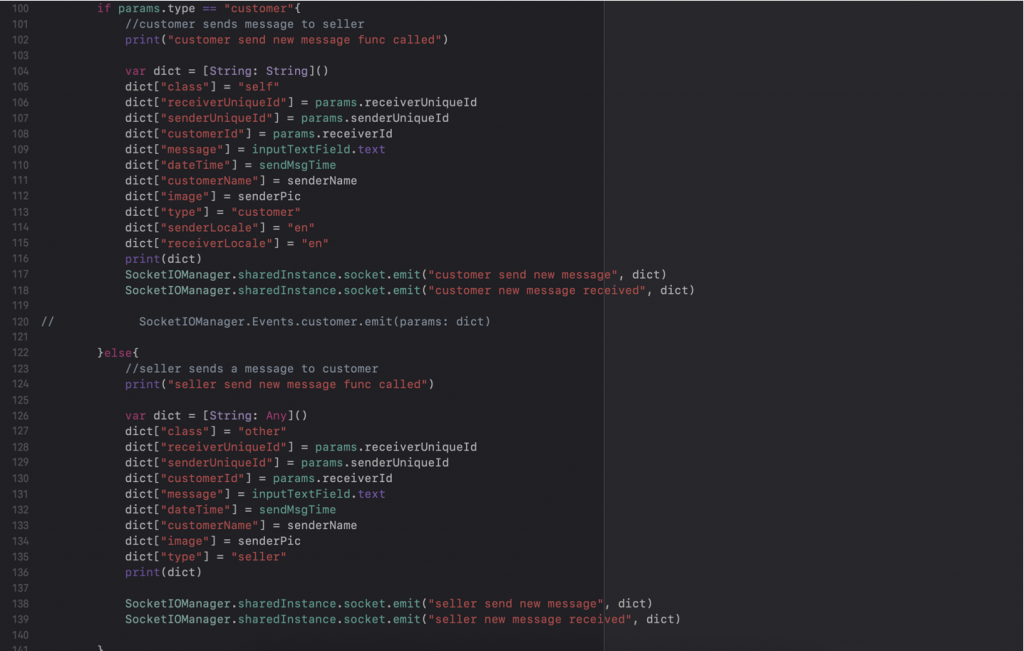
9. This is the last but not the least
By using below code you can send the message to the other user

I hope this blog will help you to implement realtime Chat, if you have any queries, comments, questions, or recommendations, feel free to post them in the comment section below!
if you want to read more about custom socket.io click here.
For other technical blogs, please click here.

Be the first to comment.