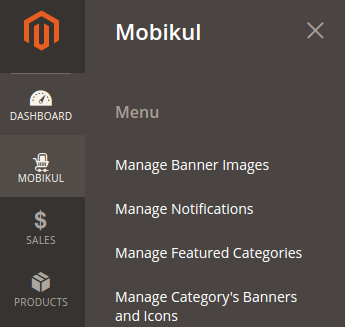
You can configure the banner image for each category and in addition to this, you can also configure the category’s icon which will be displayed in your Mobikul Mobile application. For configuring the category’s banner and icon you need to navigate through the following path of your admin panel.
Mobikul Tab > Manage Category’s Banners and Icons
Add Category’s Banner and Icon
Click on the Add Images button for adding new banner and icon to a category. You can configure the banner and icon as per your requirement by setting up the category image information.
- Icon Image: Upload the icon image of the category.
- Banner Image: Upload the banner image of the category which will be displayed in the chosen parent category.
- Store View: The Admin can select the banner for a particular store view. This is helpful in case admin wish to display banners in multiple languages.
After setting up the banner image and icon image, select the category for which both banner and icon image will be used.
Edit Category’s Banner and Icon
Editing a banner and icon of a category has no difference from adding a category’s banner and icon. The difference is, here you are updating the banner and icon with new updated information. The category’s banner and icon can be edited by simply clicking on the related Edit button present in the Action column of the category’s banner and icon.
Delete Category’s Banner and Icon
For deleting the banner and icon of a category first select the category via category’s banner and icon check box. All the categories can be selected at once by mass selection checkbox present in the checkbox column heading section.
After selecting the category click on the Actions drop-down. In the Actions drop-down, there will be an option for deleting the category’s banner and icon.

Click on the Delete option. A pop-up for delete confirmation will appear. Click on Ok to delete the selected category’s banner and icon.
If you have any issue then please let us know anytime. You can raise a ticket for any query at webkul.uvdesk.com.


Be the first to comment.