In the mobile app development lifecycle, communicating with the server(via API) to fetch or store data is one of the basic needs. In today’s blog let’s check HTTP API calling in flutter.
Fetching data from the internet is very important for most applications.
Check out more about our Flutter app development.
First of all, let’s understand API.
Application programming interface (API)
An application programming interface (API) is an interface that defines interactions between multiple software applications or mixed hardware-software intermediaries.
It defines the kinds of calls or requests that can be made, how to make them, the data formats that should be used, the conventions to follow, etc.
Flutter provides tools for API calling such as HTTP packages.
Please follow the below steps for HTTP API calling in Flutter
Step 1: Create a flutter project.
Step 2: Add the below dependencies in pubspec.yaml file
|
1 |
http: ^0.13.3 |
Now, run the command “flutter pub get” to download the dependencies.
Step 3: Let’s create a class for API calling.
|
1 2 3 4 5 6 7 8 9 10 11 12 13 14 15 16 17 18 19 20 21 22 23 24 25 |
import 'dart:convert'; import 'package:http/http.dart'; import 'model.dart'; class HttpService { final String postsURL = "https://jsonplaceholder.typicode.com/posts"; Future<List<User>> getPosts() async { Response res = await get(Uri.parse(postsURL)); if (res.statusCode == 200) { List<dynamic> body = jsonDecode(res.body); List<User> posts = body .map( (dynamic item) => User.fromJson(item), ) .toList(); return posts; } else { throw "Unable to retrieve posts."; } } } |
Step 4: Now, create a model class to store the API data.
|
1 2 3 4 5 6 7 8 9 10 11 12 13 14 15 16 17 18 19 20 21 22 23 24 25 26 27 |
import 'dart:convert'; List<User> userFromJson(String str) => List<User>.from(json.decode(str).map((x) => User.fromJson(x))); String userToJson(List<User> data) => json.encode(List<dynamic>.from(data.map((x) => x.toJson()))); class User { User({ this.userId, this.id, this.title, this.completed, }); int userId; int id; String title; bool completed; factory User.fromJson(Map<String, dynamic> json) => User( userId: json["userId"], id: json["id"], title: json["title"], completed: json["completed"], ); Map<String, dynamic> toJson() => { "userId": userId, "id": id, "title": title, "completed": completed, }; } |
Step 5: Then, call the API method from your main.dart class.
|
1 2 3 4 5 6 7 8 9 10 11 12 13 14 15 16 17 |
FutureBuilder<List<User>> _buildBody(BuildContext context) { final HttpService httpService = HttpService(); return FutureBuilder<List<User>>( future: httpService.getPosts(), builder: (context, snapshot) { if (snapshot.connectionState == ConnectionState.done) { final List<User> posts = snapshot.data; return _buildPosts(context, posts); } else { return Center( child: CircularProgressIndicator(), ); } }, ); } |
Step 6: Now, we can display our data in the form of a list. Please check below the complete code for main.dart class.
|
1 2 3 4 5 6 7 8 9 10 11 12 13 14 15 16 17 18 19 20 21 22 23 24 25 26 27 28 29 30 31 32 33 34 35 36 37 38 39 40 41 42 43 44 45 46 47 48 49 50 51 52 53 54 55 56 57 58 59 60 61 62 63 64 65 66 67 68 69 70 71 72 73 74 75 76 77 78 79 80 81 82 83 84 85 86 87 88 89 90 91 92 93 94 95 96 97 98 99 100 |
import 'dart:collection'; import 'package:flutter/material.dart'; import 'http_class.dart'; import 'model.dart'; void main() { runApp(MyApp()); } class MyApp extends StatelessWidget { // to set the root of app. @override Widget build(BuildContext context) { return MaterialApp( title: 'Flutter Demo', theme: ThemeData( primarySwatch: Colors.green, visualDensity: VisualDensity.adaptivePlatformDensity, ), home: MyHomePage(title: 'API Demo Page'), ); } } class MyHomePage extends StatefulWidget { MyHomePage({Key key, this.title}) : super(key: key); final String title; @override _MyHomePageState createState() => _MyHomePageState(); } class _MyHomePageState extends State<MyHomePage> { @override void initState() { super.initState(); } @override Widget build(BuildContext context) { return Scaffold( backgroundColor: Colors.white, appBar: AppBar( title: Text("Flutter - API Implementation"), ), body: _buildBody(context), floatingActionButton: FloatingActionButton.extended( onPressed: () { }, label:Icon(Icons.cancel), backgroundColor: Colors.green, ), ); } // build list view & manage states FutureBuilder<List<User>> _buildBody(BuildContext context) { final HttpService httpService = HttpService(); return FutureBuilder<List<User>>( future: httpService.getPosts(), builder: (context, snapshot) { if (snapshot.connectionState == ConnectionState.done) { final List<User> posts = snapshot.data; return _buildPosts(context, posts); } else { return Center( child: CircularProgressIndicator(), ); } }, ); } // build list view & its tile ListView _buildPosts(BuildContext context, List<User> posts) { return ListView.builder( itemCount: posts.length, padding: EdgeInsets.all(8), itemBuilder: (context, index) { return Card( elevation: 4, child: ListTile( title: Text( posts[index].title, style: TextStyle(fontWeight: FontWeight.bold), ), subtitle: Text(posts[index].completed.toString()), ), ); }, ); } } |
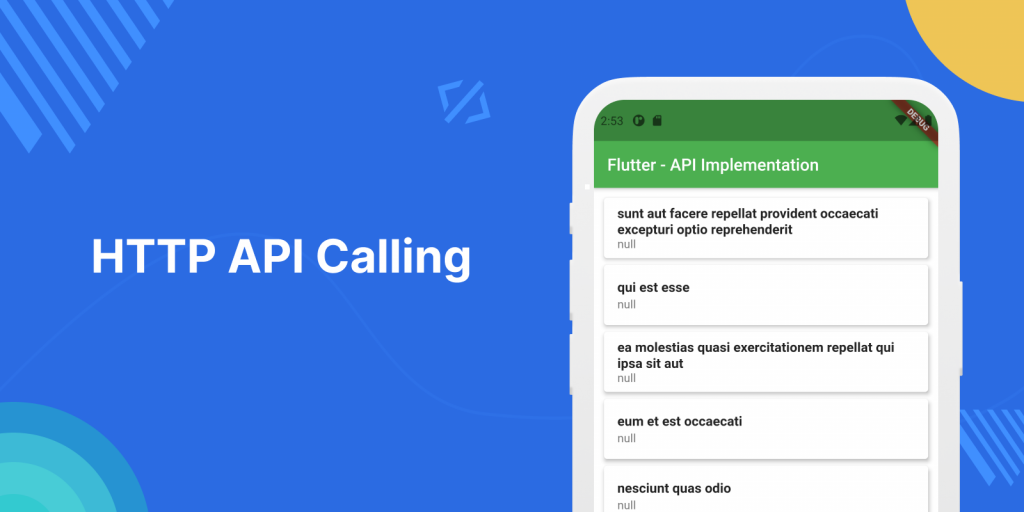
Finally, you can run the code, and see the below results.

For more details and methods you can refer to the official doc of Flutter here.
For more interesting blogs check out here.
Hope this blog helped you for a better understanding of API calling in Flutter.
Thanks for reading

4 comments
Your Welcome