In this blog we will learn about how to connect FlutterFlow with Supabase.
Introduction
FlutterFlow works smoothly with Supabase, making it a great choice for your app’s backend. Supabase is like a ready-made server that helps you manage important features without extra effort.

What is FlutterFlow
FlutterFlow is a popular visual development tool built on Flutter, allowing developers to quickly design and build web and mobile apps using a drag-and-drop interface, without writing complex code.
What is Supabase
Supabase is an open-source Backend-as-a-Service (BaaS) that provides a Firebase alternative. Its services include authentication, database management, storage, and more.
Why use FlutterFlow with Supabase
1.Flutter and Supabase are open-source, which means they are open for everyone to use and don’t lock you into one company.
2. FlutterFlow handles the frontend, Supabase handles the backend, so you don’t waste time setting up infrastructure.
3. You can focus on app logic instead of boilerplate code for login, database connections, etc
4. Supabase’s free tier combined with FlutterFlow’s low-code approach reduces development costs.
5. Supabase supports live data sync, perfect for chats, dashboards, and notifications.
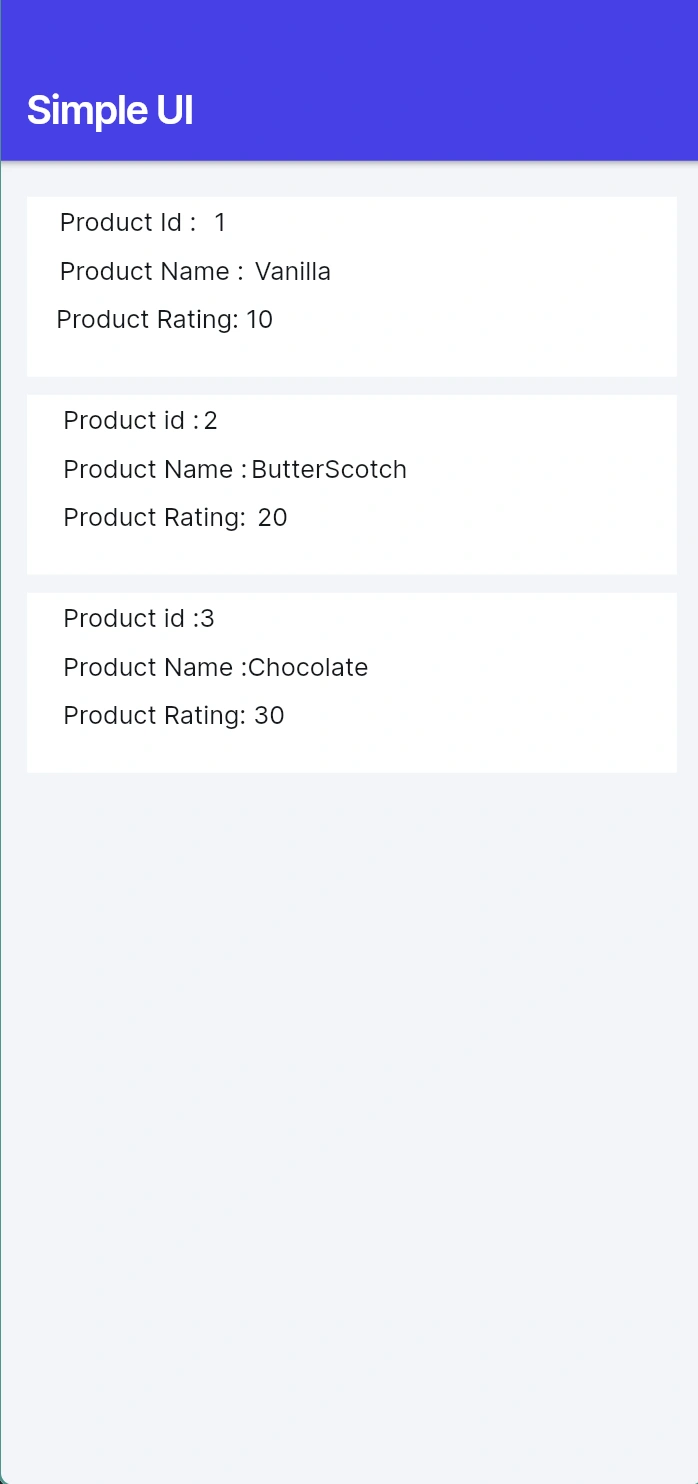
How to Create the User Interface usign the FlutterFlow
1.Create a New Project
Open FlutterFlow , start a new project and choose a blank page.
2.Add a Header Section
Drag a Container at the top, set the background color to purple, place a Text widget inside, and set it as “Simple UI” with bold styling.
3.Add a ListView for Products
Below the header, add a ListView widget to display multiple product cards.
4.Design Each Product Card
Inside the ListView, add a Container and include three Text widgets for Product Id, Product Name, and Product Price, styled with proper padding and spacing.
5.Preview the App
Run the preview and you’ll see the product list displayed as clean cards under the “Simple UI” header.
Create FlutterFlow UI
We created a product card with Product Id, Name, and Price inside a styled container.
The cards are displayed in a scrollable ListView for a clean and organized layout.

How to Create the Table using the Supabase
1. Login to Supabase
Sign in with Supabase and select your project or create a new one.
2. Open Table Editor
Go to the Database section, select Tables, and click “New Table” .
3. Define Table Name
Enter a table name.
4.Add Columns
Create columns with names, data types, and set a primary key.
5. Save the Table
Click Save to create the table, ready for data insertion.
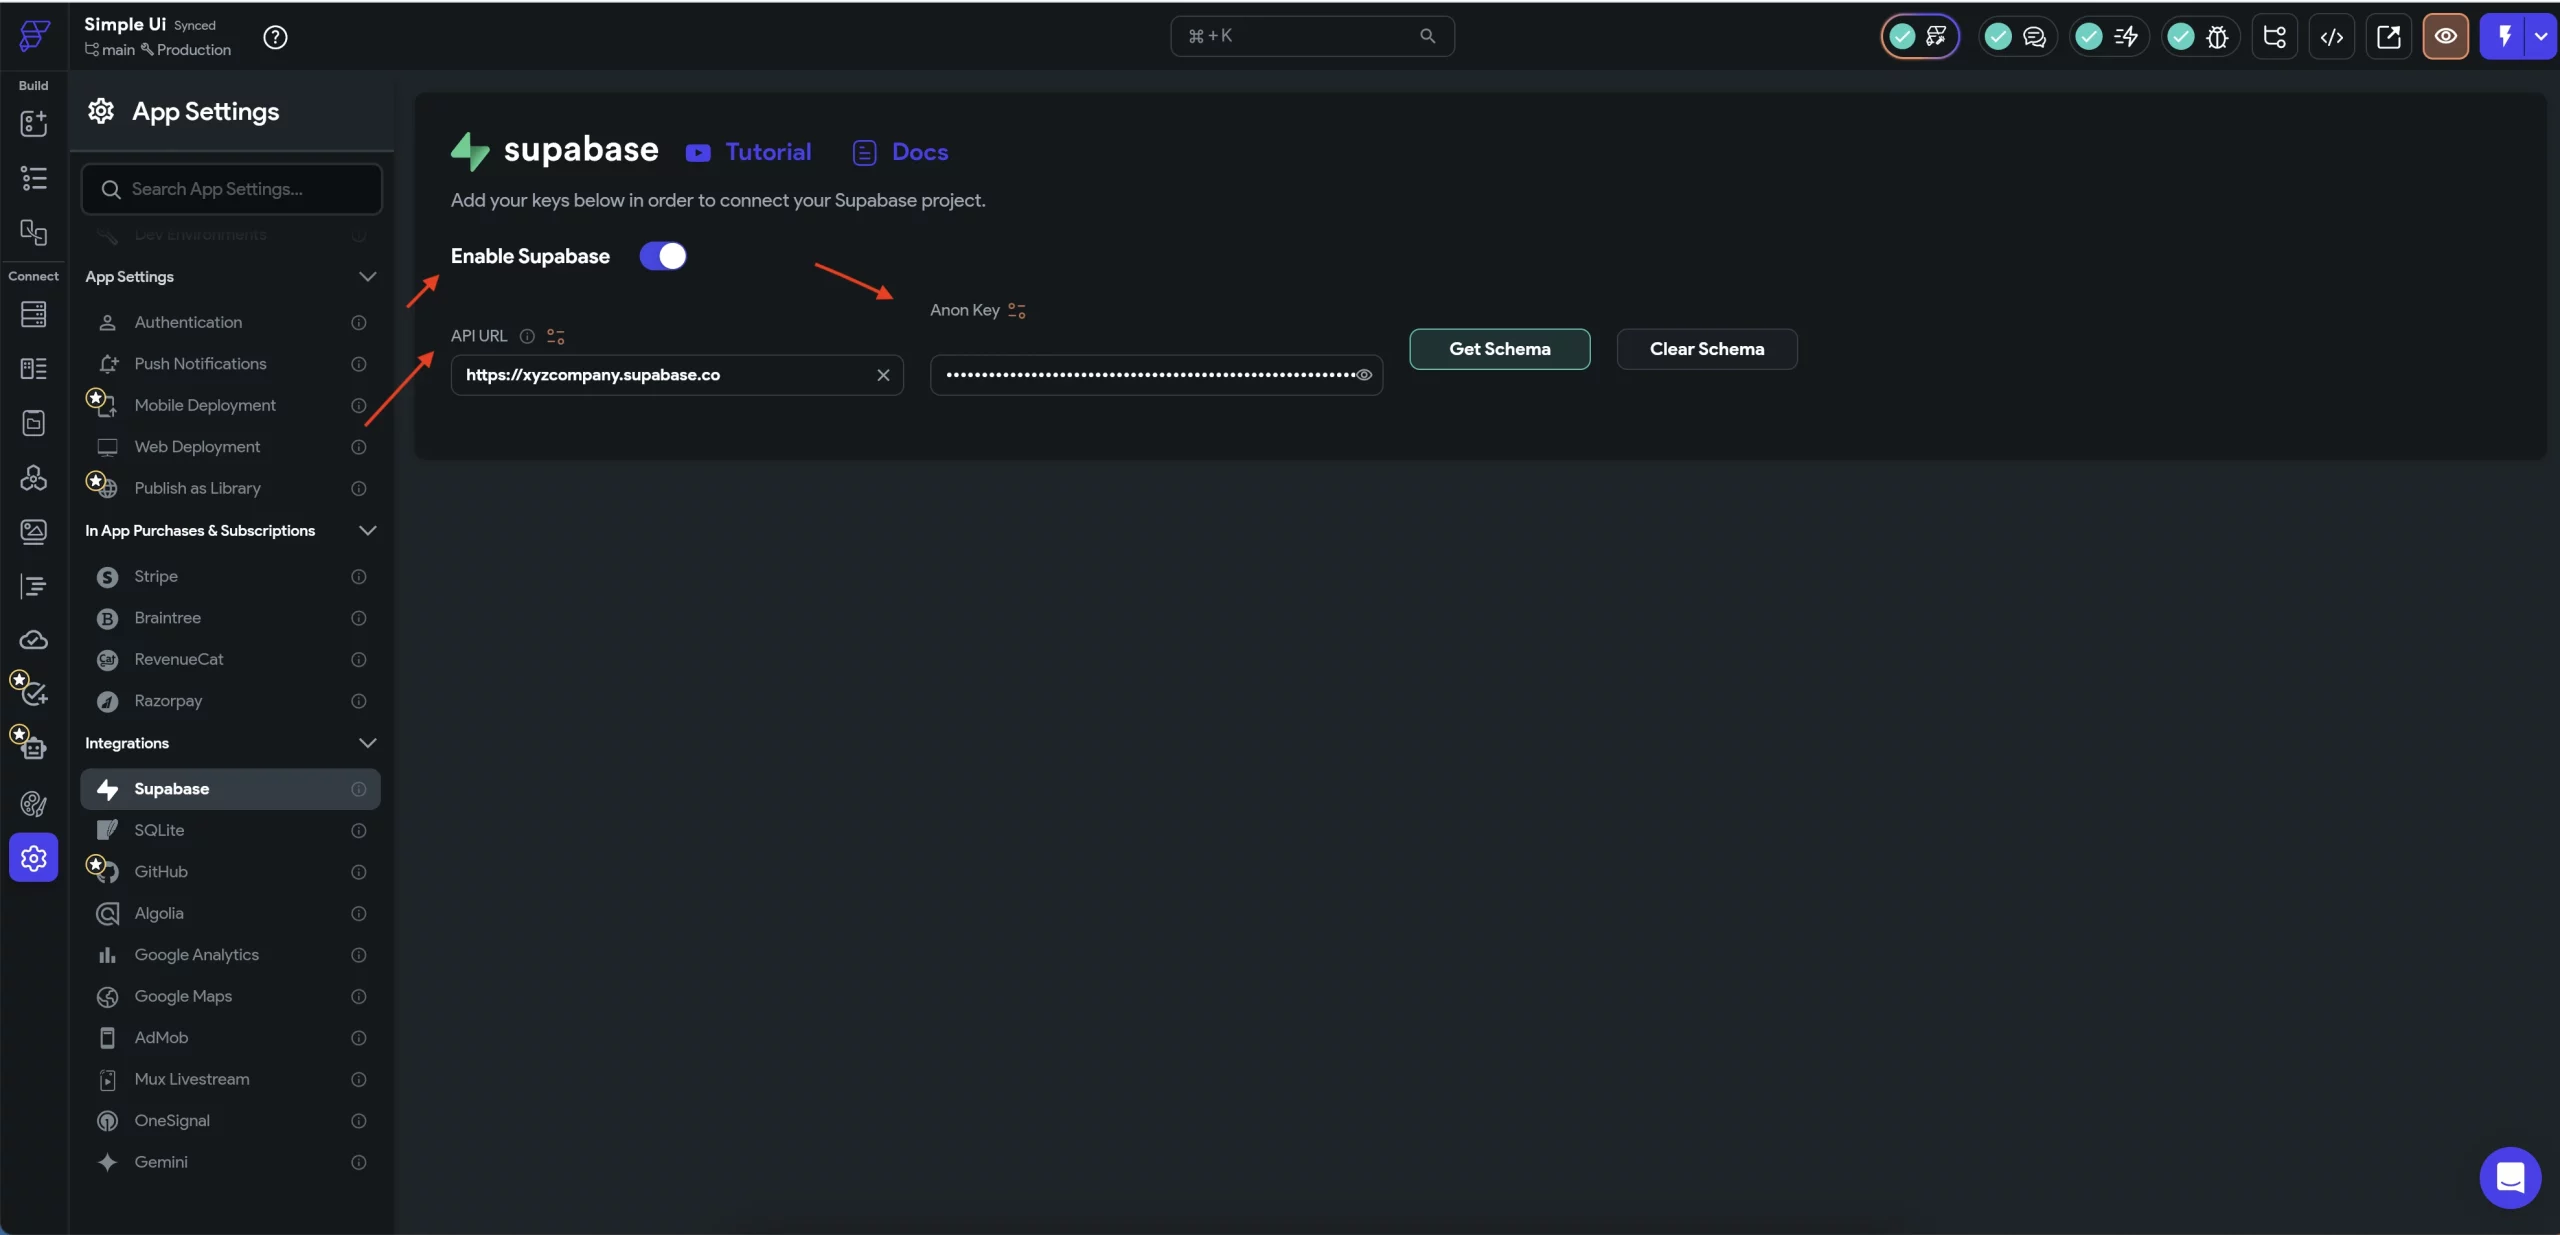
How to Connect FlutterFlow with Supabase
1.Create a Supabase Project
Sign in to Supabase, create a new project, and note the API URL and anon/public key.
2.Open FlutterFlow Project
Go to your FlutterFlow project and open the Settings and Integrations section
3.Enable Supabase
Toggle on Supabase and enter the Project URL and anon/public key from your Supabase project.
4.Configure Database
Choose the tables you want to connect from Supabase and set permissions if needed.
5.Test Connection
Run the app in FlutterFlow preview or emulator to ensure data is fetched correctly from Supabase.
Here is the Output of the project
Create FlutterFlow UI using Supabase
FlutterFlow integrates seamlessly with Supabase, enabling easy backend management for user authentication, data storage, and real-time updates.
Conclusion
FlutterFlow with Supabase makes it easy to build data-driven apps. Connect the UI to Supabase tables via the URL and anon key, while Supabase manages the backend to keep the app dynamic and scalable.

Be the first to comment.