
With the rise of eCommerce, Magento 2 has become a best platform for building multi-vendor marketplaces. Many businesses extend Magento 2 stores to mobile apps for a seamless experience.
Ensuring the stability and performance of these mobile apps requires rigorous testing. This is where Maestro comes in, playing a crucial role in the process.
In this blog article, we’ll explore how Maestro can help automate the testing of a Magento 2 multi vendor mobile app, simplifying the testing process.
What is Maestro?
Maestro is an open-source mobile UI testing framework designed for simplicity and efficiency. It allows developers and testers to write easy-to-read human-readable test scripts.
Maestro uses YAML-based test scripts to automate mobile app interactions. Unlike traditional mobile app testing tools, Maestro offers some keen features including:
- Faster execution compared to Selenium and Appium.
- Simple scripting using a human-readable YAML format.
- Cross-platform support for Android and iOS applications.
- Reliable UI interactions, handling animations and transitions smoothly.
- Integration with CI/CD pipelines for automated mobile testing.
Setting Up Maestro for Magento 2 Multi-Vendor Mobile App
Before setting up the maestro, there are some steps that you need to take before we can start our automation testing.
Prerequisites
Before starting with Maestro, ensure you have the following:
- Maestro Installed (Follow the mentioned steps to install the maestro)
- Magento 2 Multi-Vendor Mobile App (Download Mobikul Magento2 Multi-Vendor App)
- Android Debug Bridge (ADB) (Optional for installing the Android app from an .apk file)
- Xcode and iOS Simulator (For iOS testing as Maestro doesn’t support Physical iOS devices yet.)
Installation
For maestro installation, you can follow the steps below and complete your maestro step up:-
1. Install Maestro:-
Run the following command to install Maestro on macOS, Linux or Windows (WSL):
|
1 |
curl -fsSL "https://get.maestro.mobile.dev" | bash |
If you’re on macOS, you can use Homebrew instead of the install script above:
|
1 2 |
brew tap mobile-dev-inc/tap brew install maestro |
2. Verify Installation
Once the installation is completed, you can verify the installation through the following command:
|
1 |
maestro --version |
3. Connect a Device or Emulator
Before we can perform the automation testing, we need to have a device connected to our system. You can either us Physical devices or Simulators to run the test cases.
For Android, you can use adb commands to fetch the list of available connected devices
|
1 |
adb devices |
And for iOS, the below command will fetch the list of available iOS devices.
|
1 2 |
xcrun simctl list devices |
Install Magento 2 Multi-vendor Application on your device
Once the setup is completed, install the Magento 2 Marketplace App on your Android device. For iOS, Maestro doesn’t support physical devices yet, so we will work with the Android app only.
Writing Your First Test for Magento 2 Multi-Vendor App
Maestro uses Flow YAML files to define test cases. Let’s create a simple test for the Magento 2 Marketplace mobile app.
Test Case: Login as Vendor
You can write Maestro test cases manually by creating YAML-based test scripts or using the Maestro Studio. In this blog, we will focus on creating test cases using Maestro Studio.
Maestro Studio is a tool provided by Maestro that offers a UI-based approach for generating test scripts interactively.
It simplifies the process by allowing testers to record interactions and convert them into executable YAML scripts.
To use Maestro Studio, just simply run the below command on your terminal:
|
1 |
maestro studio |
The command will open the Maestro studio automatically on your default browser with the localhost:
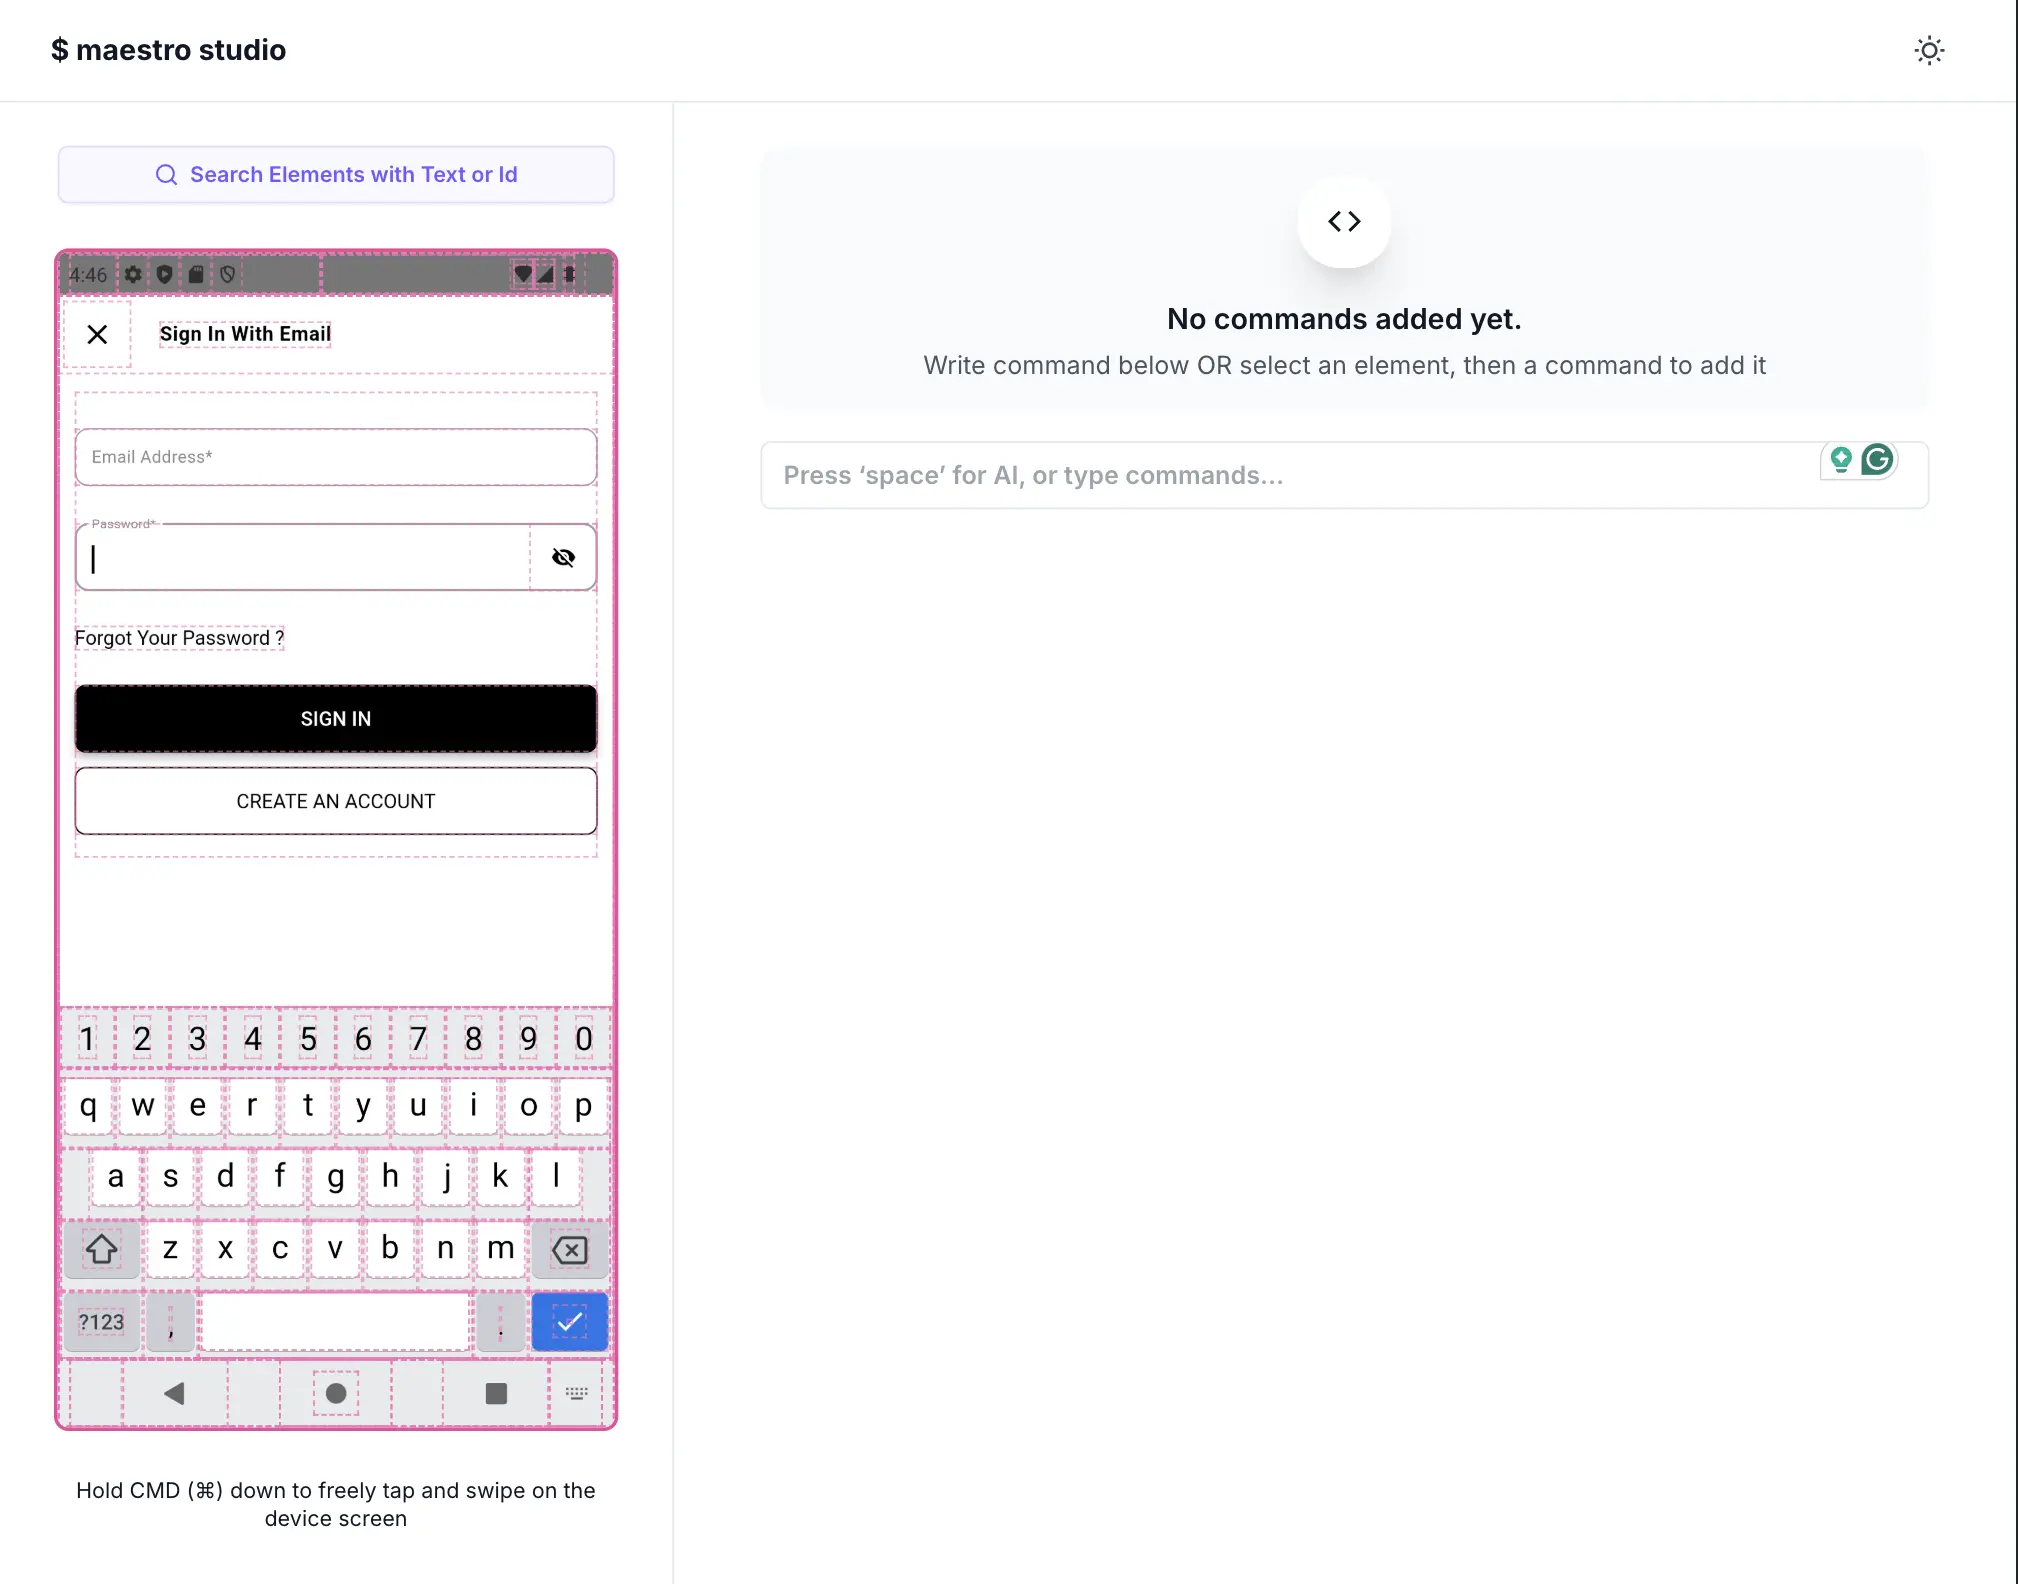
Once the Maestro Studio is started, you can simply record the steps by running the application from left side of your screen.
After recording the test cases, you can then simply extract your test cases from the Maestro Studio.
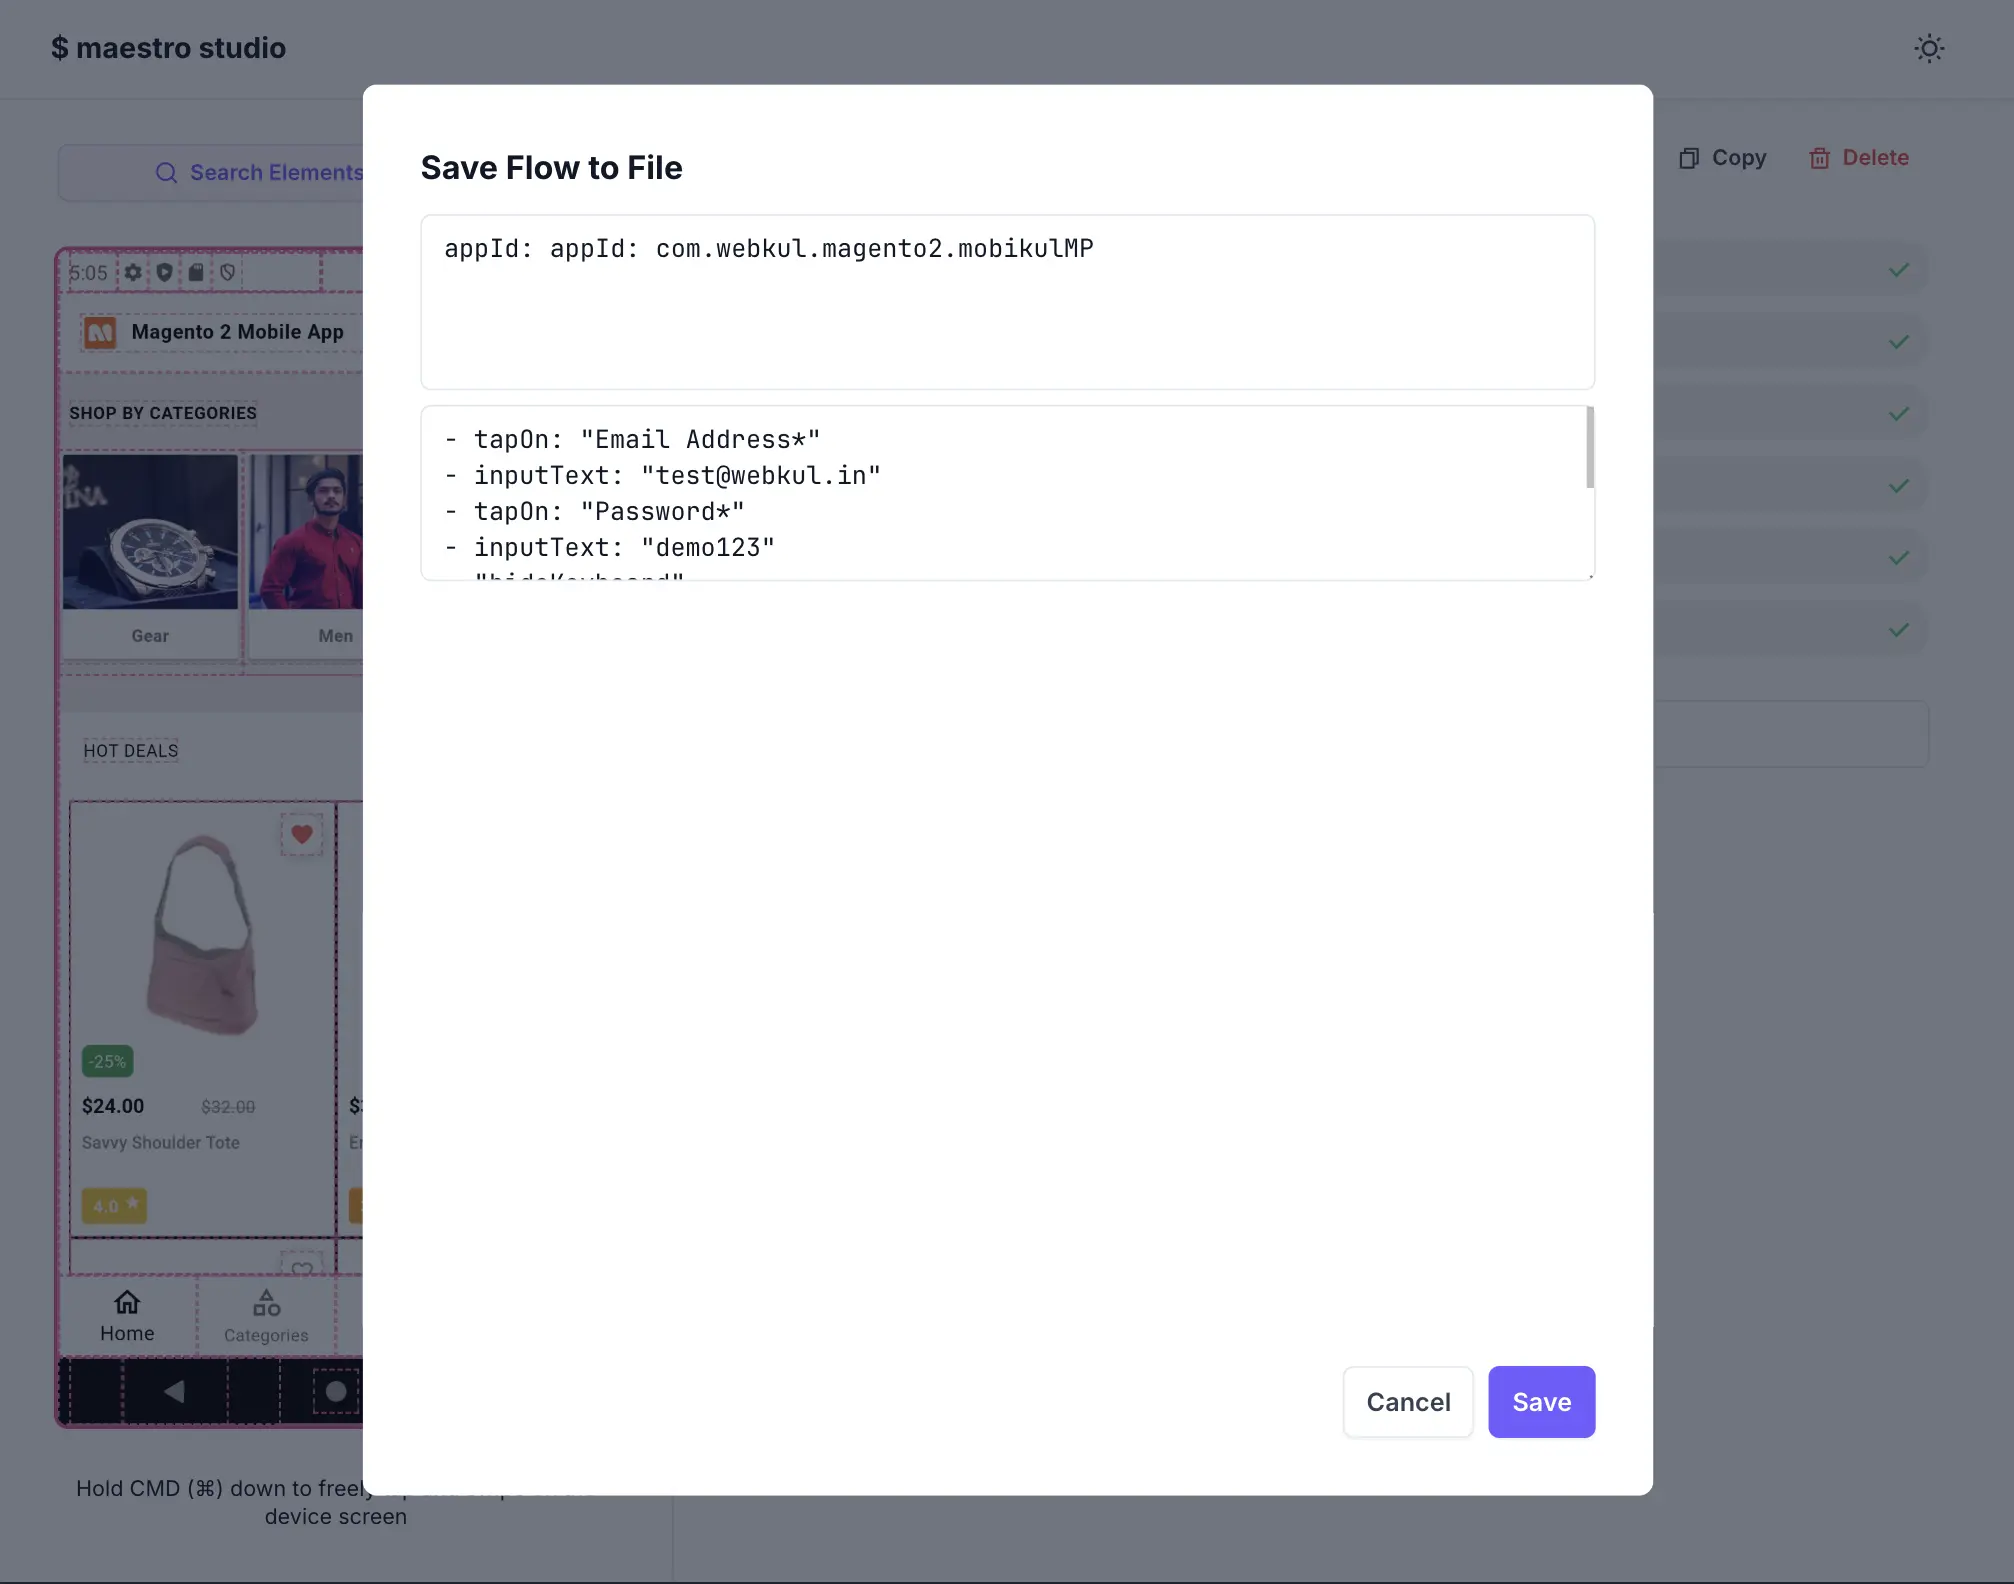
Once you extract your recorded test cases, you will receive the flow.yaml file. You may need to modify your flow.yaml file based on your screens and the steps you want to take for the testing.
Your Flow.yaml file should look like this:
|
1 2 3 4 5 6 7 8 |
appId: com.webkul.magento2.mobikulMP --- - tapOn: "Email Address*" - inputText: "test@webkul.in" - tapOn: "Password*" - inputText: "demo123" - hideKeyboard - tapOn: "SIGN IN" |
Running the Test
Once everything is setup completely, you just need to run the below command and automation testing for your Magento 2 Multi-Vendor app will start.
|
1 |
maestro test flow.yaml |
Once the command is set in motion, just sit back and watch as the maestro works its magic. :)-

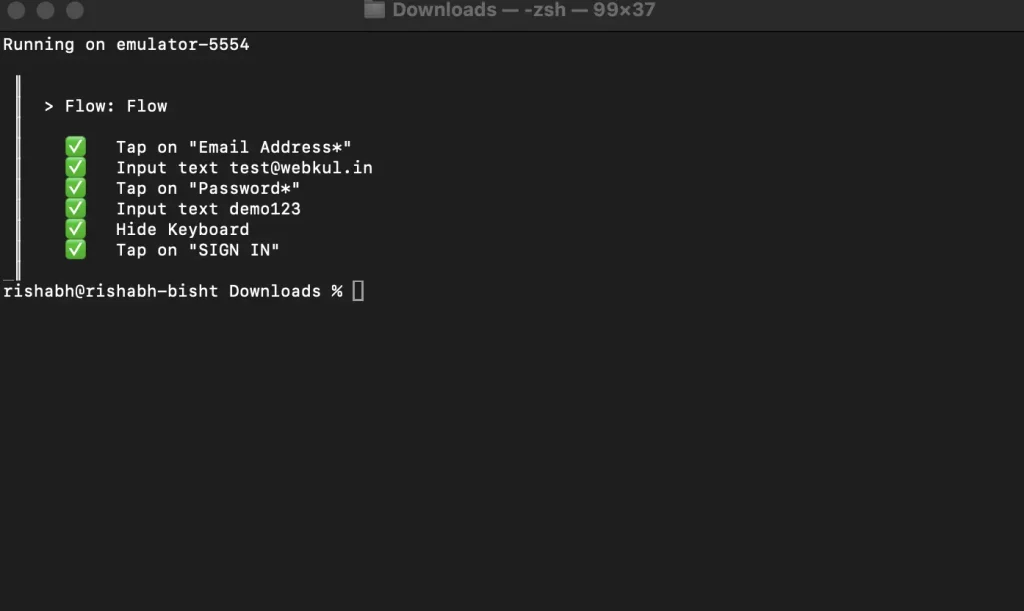
Maestro Output
After executing the maestro test flow.yaml command, your connected device will start testing the application with the script you provide/created.

Conclusion:-
Automating a Magento 2 Multi-Vendor Mobile App with Maestro ensures quality and stability. Implement Maestro today to improve the reliability of your Magento 2 marketplace app!
You can check more about the Magento 2 Multi-vendor app here. You can also follow the Maestro official documentation for future updates and all the Maestro commands.
Explore how to automate the Odoo Mobile App Automation Using Maestro and dive into the world of automation testing for Odoo mobile app.