In this blog, we will learn how to use ARCore in Android App.
Introduction
ARCore is a Google platform for creating augmented reality experiences in Android apps. It helps the app understand the real world using the camera and device motion.
In this demo app, we are using SceneView with ARCore. It helps us show an AR camera view, detect a plane, and place a 3D model on the detected surface.
You can also check our ARCore Library for Android blog.
What We Will Build
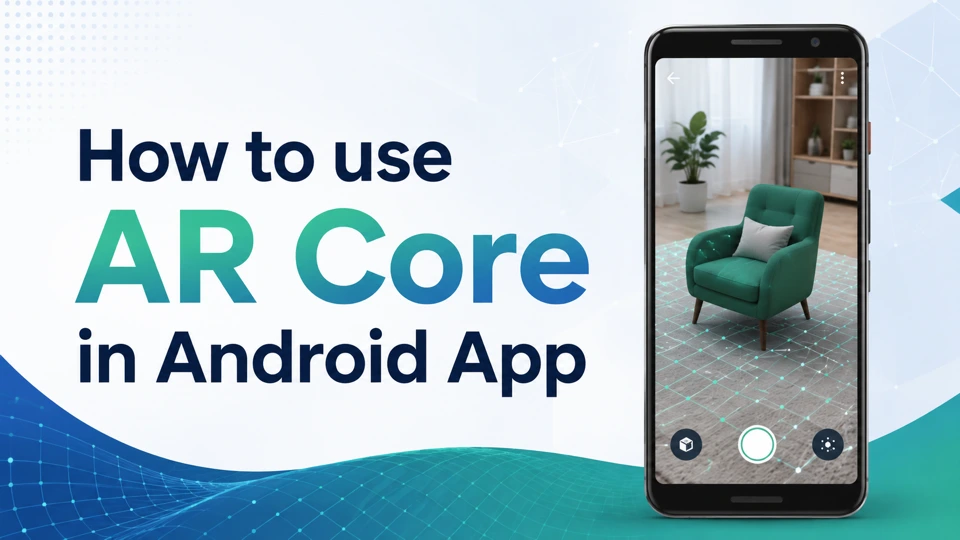
In this blog, we will create an Android AR app that loads a remote .glb model. When the user finds a plane, the app allows the user to tap and place the model.
After placing the model, the user can drag to rotate it and pinch to zoom it. This makes the AR model interactive inside the app.
You can also read about AR model in Android.
Prerequisites
Before starting, make sure you have the setup below.
- Android Studio installed in your system.
- Android device that supports ARCore.
- Google Play Services for AR installed or updated.
- Basic knowledge of Kotlin and Android.
- A demo Android project for AR implementation.
Implementation
Now we will implement ARCore in the Android app step by step.
Add SceneView Dependency in Version Catalog
When we create a new Android project, many Gradle entries are already added. So here we only need to add the SceneView AR dependency.
Open gradle/libs.versions.toml and add the below lines.
|
1 2 3 4 5 6 |
toml [versions] sceneview = "2.3.3" [libraries] sceneview-ar = { group = "io.github.sceneview", name = "arsceneview", version.ref = "sceneview" } |
Here we added sceneview-ar, which provides the AR scene view used in this project.
Add Dependency in App Gradle File
Now open the app-level build.gradle.kts file. Add only the required SceneView dependency inside the dependencies block.
|
1 2 3 4 5 |
// app/build.gradle.kts dependencies { implementation(libs.sceneview.ar) } |
In this project, minSdk is already set to 30. So it can support ARCore features.
Update AndroidManifest File
Now add camera, internet, and ARCore support in the AndroidManifest.xml file. Here we only show the required permission, feature, and metadata entries.
|
1 2 3 4 5 6 7 8 9 10 11 12 13 14 15 16 17 18 19 |
// app/src/main/AndroidManifest.xml <uses-permission android:name="android.permission.CAMERA" /> <uses-permission android:name="android.permission.INTERNET" /> <uses-feature android:name="android.hardware.camera" android:required="true" /> <uses-feature android:name="android.hardware.camera.ar" android:required="true" /> // Now add the below metadata inside the `application` tag. <meta-data android:name="com.google.ar.core" tools:replace="android:value" android:value="required" /> |
Here, com.google.ar.core is marked as required. So the app will run on ARCore-supported devices.
For more details, check the official ARCore setup guide.
Create AR Layout
Now create the layout file for the AR screen. This layout contains ARSceneView for showing the camera view and a TextView for showing user instructions.
|
1 2 3 4 5 6 7 8 9 10 11 12 13 14 15 16 17 18 19 20 21 22 23 24 25 26 27 28 29 30 31 32 33 34 35 36 |
// app/src/main/res/layout/activity_main.xml <?xml version="1.0" encoding="utf-8"?> <androidx.constraintlayout.widget.ConstraintLayout xmlns:android="http://schemas.android.com/apk/res/android" xmlns:app="http://schemas.android.com/apk/res-auto" android:id="@+id/main" android:layout_width="match_parent" android:layout_height="match_parent"> <io.github.sceneview.ar.ARSceneView android:id="@+id/arSceneView" android:layout_width="0dp" android:layout_height="0dp" android:keepScreenOn="true" app:layout_constraintBottom_toBottomOf="parent" app:layout_constraintEnd_toEndOf="parent" app:layout_constraintStart_toStartOf="parent" app:layout_constraintTop_toTopOf="parent" /> <TextView android:id="@+id/tvHint" android:layout_width="0dp" android:layout_height="wrap_content" android:layout_marginStart="16dp" android:layout_marginTop="24dp" android:layout_marginEnd="16dp" android:background="#AA000000" android:padding="14dp" android:text="@string/ar_initial_message" android:textColor="@android:color/white" android:textSize="14sp" app:layout_constraintEnd_toEndOf="parent" app:layout_constraintStart_toStartOf="parent" app:layout_constraintTop_toTopOf="parent" /> </androidx.constraintlayout.widget.ConstraintLayout> |
The ARSceneView fills the complete screen. The hint text is shown at the top of the screen.
Create Model Controller
Now create ArModelController.kt. This file manages model rotation and zoom gestures after the model is placed.
|
1 2 3 4 5 6 7 8 9 10 11 12 13 14 15 16 17 18 19 20 21 22 23 24 25 26 27 28 29 30 31 32 33 34 35 36 37 38 39 40 41 42 43 44 45 46 47 48 49 50 51 52 53 54 55 56 57 58 59 60 61 62 63 64 65 66 67 68 69 70 71 72 73 74 75 76 77 78 79 80 81 82 83 |
// app/src/main/java/com/webkul/demoapp/ArModelController.kt package com.webkul.demoapp import android.content.Context import android.view.MotionEvent import android.view.ScaleGestureDetector import io.github.sceneview.math.Rotation import io.github.sceneview.math.Scale import io.github.sceneview.node.ModelNode class ArModelController(context: Context) { private var modelNode: ModelNode? = null private var lastX = 0f private var lastY = 0f private var modelScale = 1f private var rotationX = 0f private var rotationY = 0f private val scaleDetector = ScaleGestureDetector( context, object : ScaleGestureDetector.SimpleOnScaleGestureListener() { override fun onScale(detector: ScaleGestureDetector): Boolean { val node = modelNode ?: return false modelScale = (modelScale * detector.scaleFactor).coerceIn(MIN_SCALE, MAX_SCALE) node.scale = Scale(modelScale) return true } } ) fun attach(modelNode: ModelNode) { this.modelNode = modelNode modelScale = modelNode.scale.x rotationX = modelNode.rotation.x rotationY = modelNode.rotation.y } fun onTouchEvent(event: MotionEvent): Boolean { if (modelNode == null) { return false } scaleDetector.onTouchEvent(event) if (event.pointerCount > 1) { return true } when (event.action) { MotionEvent.ACTION_DOWN -> { lastX = event.x lastY = event.y } MotionEvent.ACTION_MOVE -> { val dx = event.x - lastX val dy = event.y - lastY rotationY += dx * ROTATION_SPEED rotationX += dy * ROTATION_SPEED modelNode?.rotation = Rotation(x = rotationX, y = rotationY, z = 0f) lastX = event.x lastY = event.y } } return true } fun clear() { modelNode = null } companion object { private const val MIN_SCALE = 0.2f private const val MAX_SCALE = 2.5f private const val ROTATION_SPEED = 0.5f } } |
Create Main Activity
|
1 2 3 4 5 6 7 8 9 10 11 12 13 14 15 16 17 18 19 20 21 22 23 24 25 26 27 28 29 30 31 32 33 34 35 36 37 38 39 40 41 42 43 44 45 46 47 48 49 50 51 52 53 54 55 56 57 58 59 60 61 62 63 64 65 66 67 68 69 70 71 72 73 74 75 76 77 78 79 80 81 82 83 84 85 86 87 88 89 90 91 92 93 94 95 96 97 98 99 100 101 102 103 104 105 106 107 108 109 110 111 112 113 114 115 116 117 118 119 120 121 122 123 124 125 126 127 128 129 130 131 132 133 134 135 136 137 138 139 140 141 142 143 144 145 146 147 148 149 150 151 152 153 154 155 156 157 158 159 160 161 162 163 164 165 166 167 168 169 170 171 172 173 174 175 176 177 178 179 180 181 182 183 184 185 186 187 |
// app/src/main/java/com/webkul/demoapp/MainActivity.kt package com.webkul.demoapp import android.Manifest import android.content.pm.PackageManager import android.os.Bundle import android.view.MotionEvent import android.widget.TextView import android.widget.Toast import androidx.activity.result.contract.ActivityResultContracts import androidx.appcompat.app.AppCompatActivity import androidx.core.content.ContextCompat import com.google.ar.core.Config import com.google.ar.core.Plane import com.google.ar.core.TrackingState import io.github.sceneview.ar.ARSceneView import io.github.sceneview.ar.arcore.createAnchorOrNull import io.github.sceneview.ar.arcore.getUpdatedPlanes import io.github.sceneview.ar.node.AnchorNode import io.github.sceneview.math.Position import io.github.sceneview.model.ModelInstance import io.github.sceneview.node.ModelNode class MainActivity : AppCompatActivity() { private lateinit var arSceneView: ARSceneView private lateinit var hintTextView: TextView private lateinit var modelController: ArModelController private var placedAnchorNode: AnchorNode? = null private var modelInstance: ModelInstance? = null private var modelLoadFailed = false private var isModelLoading = false private val cameraPermissionLauncher = registerForActivityResult(ActivityResultContracts.RequestPermission()) { isGranted -> if (isGranted) { setupAr() } else { showMessage("Camera permission is required to use AR.") } } override fun onCreate(savedInstanceState: Bundle?) { super.onCreate(savedInstanceState) setContentView(R.layout.activity_main) arSceneView = findViewById(R.id.arSceneView) hintTextView = findViewById(R.id.tvHint) modelController = ArModelController(this) if (hasCameraPermission()) { setupAr() } else { cameraPermissionLauncher.launch(Manifest.permission.CAMERA) } } override fun onDestroy() { placedAnchorNode?.anchor?.detach() modelController.clear() super.onDestroy() } private fun setupAr() { arSceneView.lifecycle = lifecycle arSceneView.configureSession { _, config -> config.planeFindingMode = Config.PlaneFindingMode.HORIZONTAL config.lightEstimationMode = Config.LightEstimationMode.ENVIRONMENTAL_HDR } arSceneView.onSessionUpdated = { _, frame -> val planeFound = frame.getUpdatedPlanes().any { plane -> plane.type == Plane.Type.HORIZONTAL_UPWARD_FACING && plane.trackingState == TrackingState.TRACKING } if (planeFound && placedAnchorNode == null && !isModelLoading) { showMessage("Plane found. Tap on the surface to place the model.") } } arSceneView.onSessionFailed = { exception -> showMessage(exception.message ?: "AR session failed.") } arSceneView.setOnTouchListener { _, event -> if (placedAnchorNode != null) { modelController.onTouchEvent(event) } else if (event.action == MotionEvent.ACTION_UP) { placeModel(event.x, event.y) } true } loadModel() } private fun placeModel(x: Float, y: Float) { if (isModelLoading || placedAnchorNode != null) { showMessage("Model is still loading. Please wait.") return } if (modelLoadFailed) { showMessage("Model could not be loaded.") return } val loadedModelInstance = modelInstance if (loadedModelInstance == null) { showMessage("Model is not ready yet.") return } val hitResult = arSceneView.hitTestAR( xPx = x, yPx = y, planeTypes = setOf(Plane.Type.HORIZONTAL_UPWARD_FACING) ) val anchor = hitResult?.createAnchorOrNull() if (anchor == null) { toast("Move the phone until a plane is detected.") return } val anchorNode = AnchorNode(arSceneView.engine, anchor) val modelNode = ModelNode( modelInstance = loadedModelInstance, scaleToUnits = 0.5f, centerOrigin = Position(y = 0.0f) ) modelNode.parent = anchorNode arSceneView.addChildNode(anchorNode) placedAnchorNode = anchorNode modelController.attach(modelNode) showMessage("Drag to rotate. Pinch to zoom.") } private fun loadModel() { if (isModelLoading || modelInstance != null) { return } isModelLoading = true showMessage("Loading model...") arSceneView.modelLoader.loadModelInstanceAsync(MODEL_URL) { loadedModelInstance -> runOnUiThread { isModelLoading = false if (loadedModelInstance == null) { modelLoadFailed = true showMessage("Model could not be loaded.") } else { modelInstance = loadedModelInstance showMessage("Model ready. Find a plane and tap to place it.") } } } } private fun hasCameraPermission(): Boolean { return ContextCompat.checkSelfPermission( this, Manifest.permission.CAMERA ) == PackageManager.PERMISSION_GRANTED } private fun showMessage(message: String) { hintTextView.text = message } private fun toast(message: String) { Toast.makeText(this, message, Toast.LENGTH_SHORT).show() } companion object { private const val MODEL_URL = "https://raw.githubusercontent.com/KhronosGroup/glTF-Sample-Models/main/2.0/DamagedHelmet/glTF-Binary/DamagedHelmet.glb" } } |
How ARCore Works in This App
- First, the app asks for camera permission.
- Then
ARSceneViewstarts the AR session and detects horizontal planes. - After that, the app loads the remote
.glbmodel. - When the user taps on a detected plane, the app creates an anchor.
- Finally, the model is attached to the anchor and shown in the real world.
Here is the Output of the project
- After running the app, the AR camera view will open.
- The app will show a message to move the phone slowly.
- When a plane is detected, the app asks the user to tap on the surface.
- After tapping, the 3D model is placed on the detected plane.
- Now the user can drag the model to rotate it and pinch to zoom it.
- You can add the output video here after recording the demo app.
ARCore Android App
The ARCore Android app is now ready. The app detects a real-world surface using the device camera and allows users to place a 3D model on the detected plane.
After placing the model, users can drag it to rotate and use pinch gestures to zoom in or out, providing an interactive augmented reality experience.

Benefits of ARCore in Android App
- ARCore helps us build interactive augmented reality apps.
- It can detect real-world surfaces using the camera.
- It supports anchors, plane detection, and light estimation.
- With SceneView, we can load and render 3D models more easily.
- It improves the user experience with real-world interaction.
Conclusion
In this blog, we learned how to use ARCore in Android App using the provided demo project source code. We added the main Gradle, manifest, layout, controller, and Activity files.
We also placed a 3D model on a detected plane and added gestures for rotate and zoom. You can also check the official ARCore setup guide for more details.
Thanks for reading this blog.
Please check my other blogs here.