In this blog, we are going to learn about the Storage in Firebase in Swift. In today’s world, we need to store our data like images or any file for which we need storage. Firebase provides free tools to the developer under a certain limit to play around with its tools.
Storage is required by every other app to save the user data into the server and get a URL of their data for use everywhere in the application.
Please follow the steps to integrate the Storage in Firebase in Swift.
STEPS TO INTEGRATE
Steps 1:-
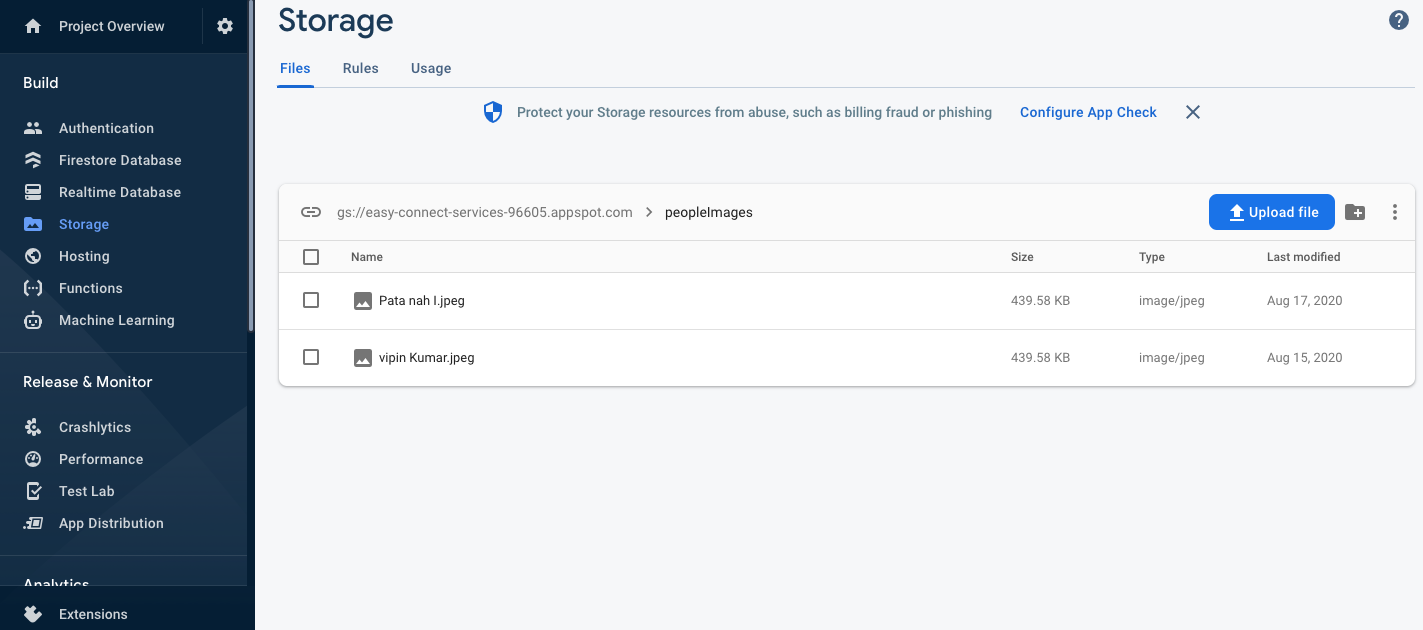
Please create a project in your firebase account and set up Storage from your firebase account

Steps 2:-
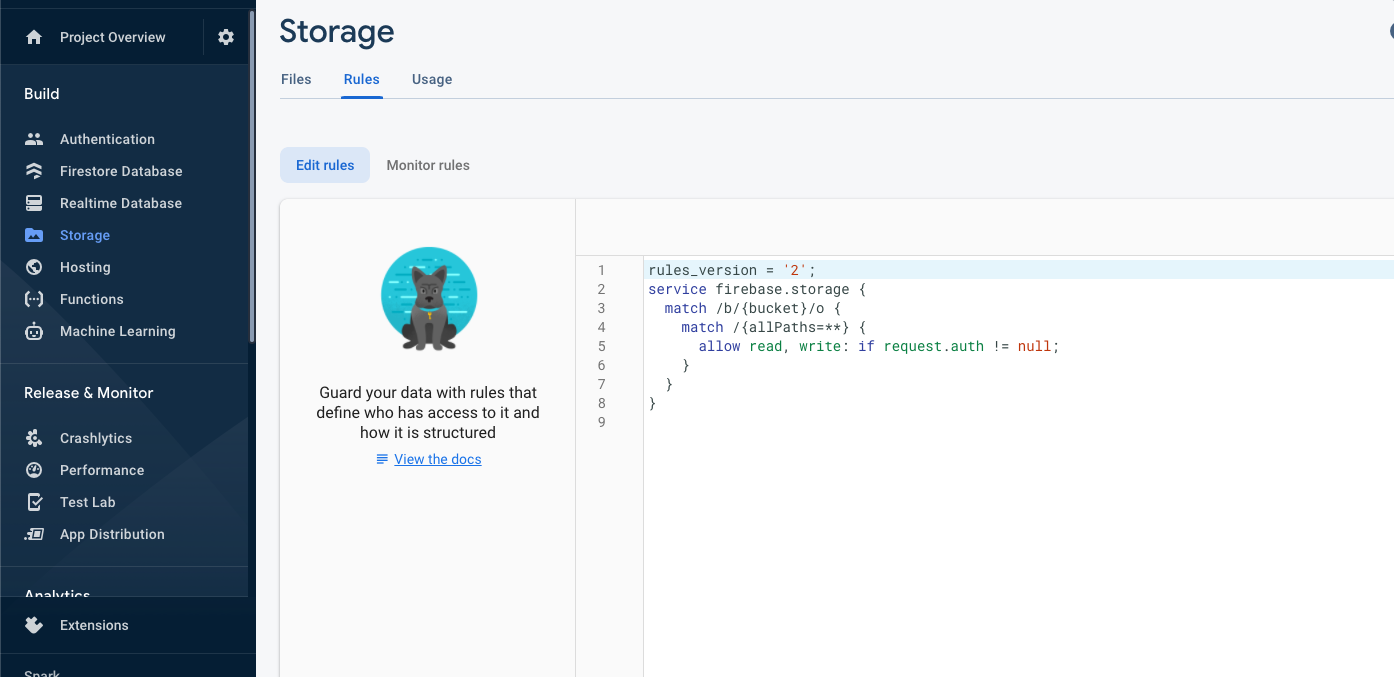
Now create a folder in the Storage of your firebase project for saving your data and define the security rules mention in the image below. After that generate a google-service file and add it to your iOS project.

Step -3:-
Thereafter, add the pod into your Podfile and install them.
|
1 2 |
pod 'Firebase/Core', '6.1.0' pod 'Firebase/Storage', '6.1.0' |
Step – 4:-
Now create a view controller, image view, and button for uploading the data from your iOS app.
|
1 |
import FirebaseStorage |
|
1 2 3 |
@IBAction func saveBtnTapped(_ sender: UIButton) { uploadImageThanDocument() } |
Step – 5:-
Please make sure to add the correct name of your folder as created on your firebase project.
|
1 2 3 4 5 6 7 8 9 10 11 12 13 14 15 16 17 18 19 20 21 22 23 24 25 26 27 28 29 30 31 32 33 34 |
func uploadImageThanDocument() { guard let image = peopleImageView.image else { simpleAlert(title: "Error", msg: "Please add your image.") return } activityIndicator.startAnimating() guard let data = image.jpegData(compressionQuality: 0.2) else { return } let imageRef = Storage.storage().reference() .child("/peopleImages/\(name).jpeg") let metaData = StorageMetadata() metaData.contentType = "image/jpeg" imageRef.putData(data, metadata: metaData) { (metData, error) in if let error = error { self.handleError(error: error, msg: "Fail to upload image") return } imageRef.downloadURL { (url, error) in if let error = error { self.handleError(error: error, msg: "Fails to download url") return } guard let url = url else { return } // Here we get url of the image } } } |
Step -6:-
After uploading your image in firebase, we will get a URL that we can use for saving it and can use it wherever you want.
In conclusion
We have successfully uploaded the image to your firebase storage from your iOS app for more information please refer to here. In addition, please refer to here for checking another blog