
“Sign In with Apple” is a new authentication feature in iOS 13. Like login with Facebook and Gmail now, you can easily and securely log in with your Apple account also.
Please follow the below steps to integrate Sign In with Apple in your iOS application.
Note: To integrate Sign In with Apple you must have updated Xcode version 11.1
1- Setup Sign in with Apple in Project
Step 1: Create a new project, Go to “Target”, click on “Capability” and add “Sign In with Apple” capability in your project.


Step 2: Now configure this Sign In with Apple capability in app identifier in Developer account.
Certificates, Identifiers & Profile Identifiers > Identifiers > Your app identifier


Step 3: Then, add Keys for Apple Sign in. To do this Go to,
Certificates, Identifiers & Profile Identifiers > Keys > Create Keys

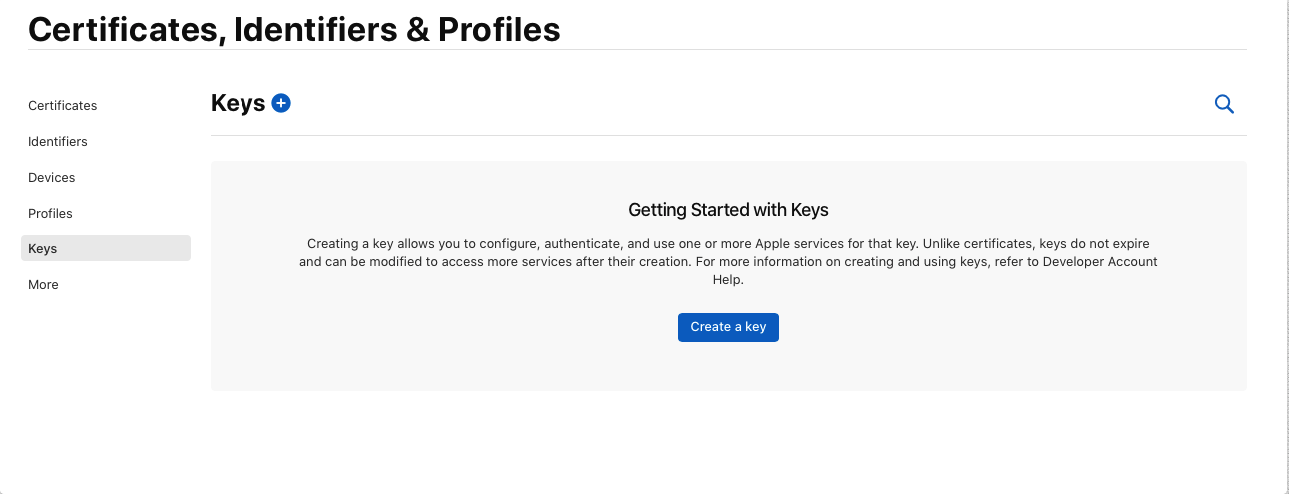
Step 4: Enter the name of keys and check Sign in with Apple option and click on configure button and choose your app bundle id, then click on Save and Register the Key.
2- Do the Code on project
Step 1: Add a Button on UIViewController in storyboard.
Step 2: Make the outlet of that btn and name it as appleSignInBtn, also make the action outlet of that button and name it as appleSignInBtnClicked.
Step 3: Let’s add below code in View Controller
|
1 2 3 4 5 6 7 8 9 10 11 12 13 14 15 16 17 18 19 20 21 22 23 |
import UIKit import AuthenticationServices class ViewController: UIViewController { @IBOutlet weak var btnAppleSignIn: UIButton! override func viewDidLoad() { super.viewDidLoad() // Do any additional setup after loading the view. } @IBAction func appleSigninTapped(_ sender: Any) { let appleIDProvider = ASAuthorizationAppleIDProvider() let request = appleIDProvider.createRequest() request.requestedScopes = [.fullName, .email] let authorizationController = ASAuthorizationController(authorizationRequests: [request]) authorizationController.delegate = self authorizationController.presentationContextProvider = self authorizationController.performRequests() } } |
Step 4: Now, make extension to implement ASAuthorizationControllerDelegate, ASAuthorizationControllerPresentationContextProviding methods.
|
1 2 3 4 5 6 7 8 9 10 11 12 13 14 15 16 17 18 19 20 21 22 23 24 25 26 27 28 29 30 |
extension ViewController: ASAuthorizationControllerDelegate, ASAuthorizationControllerPresentationContextProviding { func presentationAnchor(for controller: ASAuthorizationController) -> ASPresentationAnchor { return self.view.window! } func authorizationController(controller: ASAuthorizationController, didCompleteWithError error: Error) { print(error.localizedDescription) } func authorizationController(controller: ASAuthorizationController, didCompleteWithAuthorization authorization: ASAuthorization) { print("Authorization Done") if let appleId = authorization.credential as? ASAuthorizationAppleIDCredential { let applId = appleId.user let firstName = appleId.fullName!.givenName let lastName = appleId.fullName!.familyName let email = appleId.email print("Apple Id \(applId)") print("Apple Id \(String(describing: firstName))") print("Apple Id \(String(describing: lastName))") print("Apple Id \(String(describing: email))") redirectFurther() } } func redirectFurther() { // Write code here to proceed further after login. } } |
You can run the app now and check the feature.
A button will be shown and when you click on the button it will open the popup with AppleId information, you can login and continue.
Hope this article helps you.
For any queries, please feel free to add a comment in the comments section.