

Native Development Kit (NDK)
The Native Development Kit (NDK) is a set of tools that allows you to use C and C++ code with Android, and provides platform libraries you can use to manage native activities and access physical device components, such as sensors and touch input.
Why use NDK?
1. Increase performance: Run computationally intensive applications, such as games app or physics simulations
2. Reuse Code: You can reuse your own or other developers’ C or C++ libraries.
The disadvantage of using NDK
1. NDK cannot access lots of APIs available in the Android SDK directly, and developing in NDK will always introduce extra complexity into your application
Install and configure the NDK and CMake
To compile and debug native code for your app, you need the following components:
NDK: The Android Native Development Kit is a set of tools that allows you to use C and C++ code with Android.
CMake: CMake is an external build tool that works alongside Gradle to build your native library. You do not need this component if you only plan to use ndk-build.
LLDB: LLDB is the debugger Android Studio uses to debug native code.
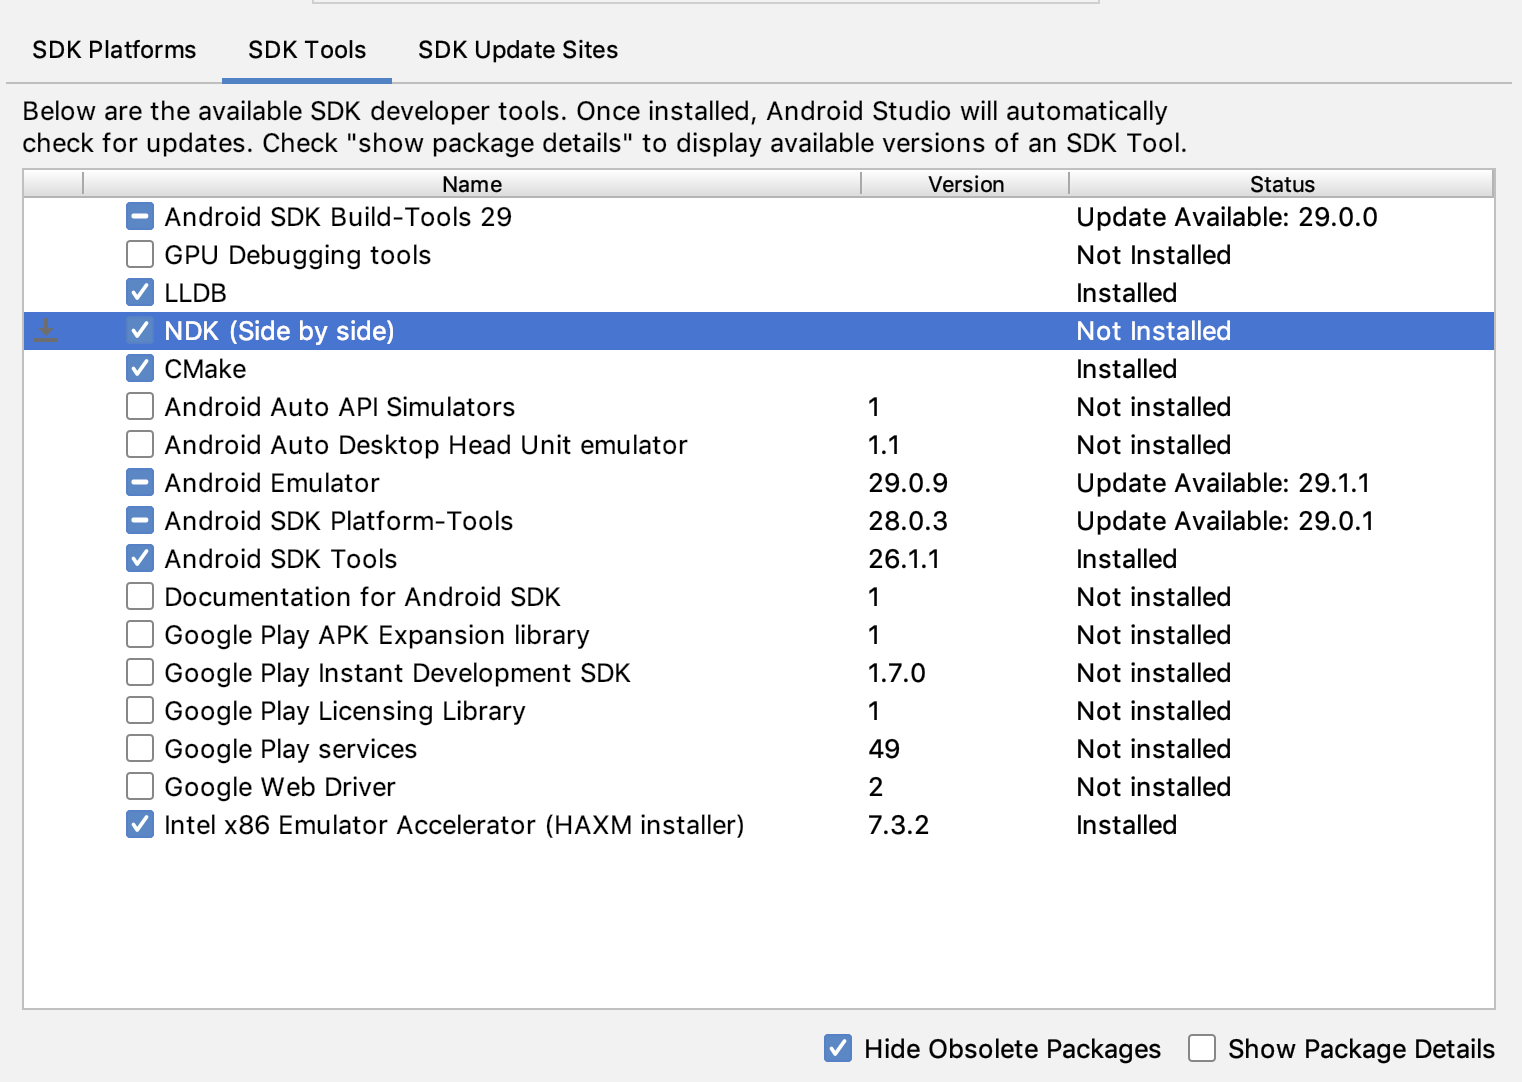
1. With a project open, click Tools > SDK Manager. or With welcome screen click Configure > SDK Manager

2. Click the SDK Tools tab.
3. Select the NDK (Side by side) and CMake checkboxes.
Create a Project with Android NDK
Step1: Open the welcome screen and create a new project and Select the Native C++ template and click on Next

Step2: Enter the project details and click on Next.

Step3: Choose the default compiler.

You will get the following project structure. There is the default “Hello World” native-lib.cpp file that contains the C++ code.
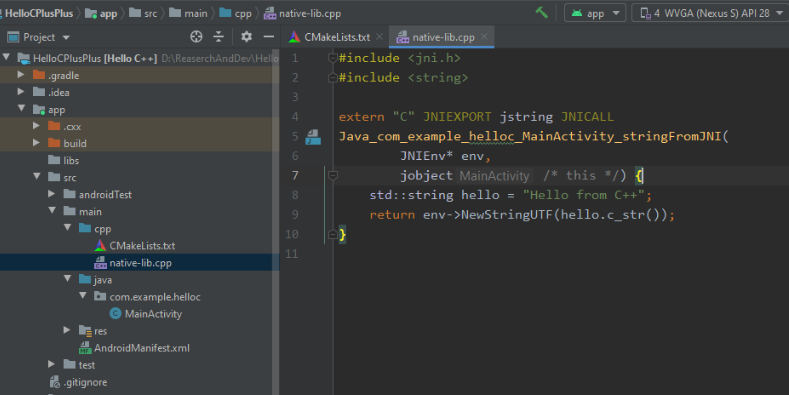
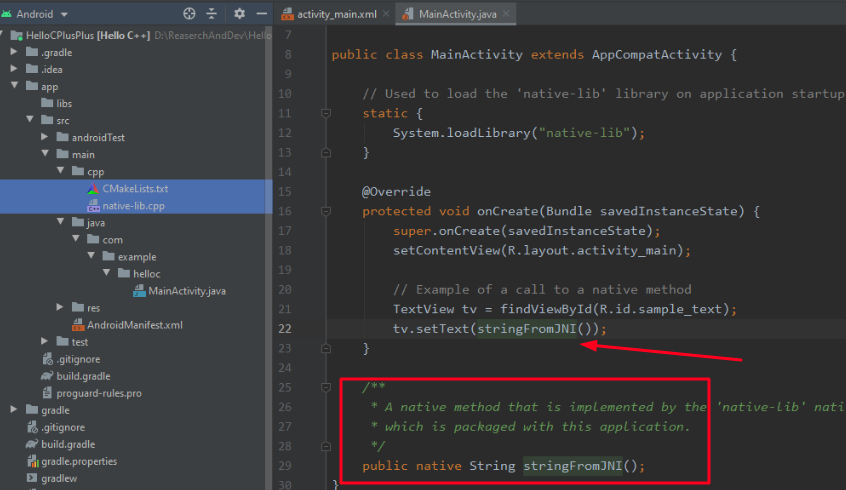
This is the “Hello world” introduction of Android NDK.
Happy Learning 🙂
Reference –