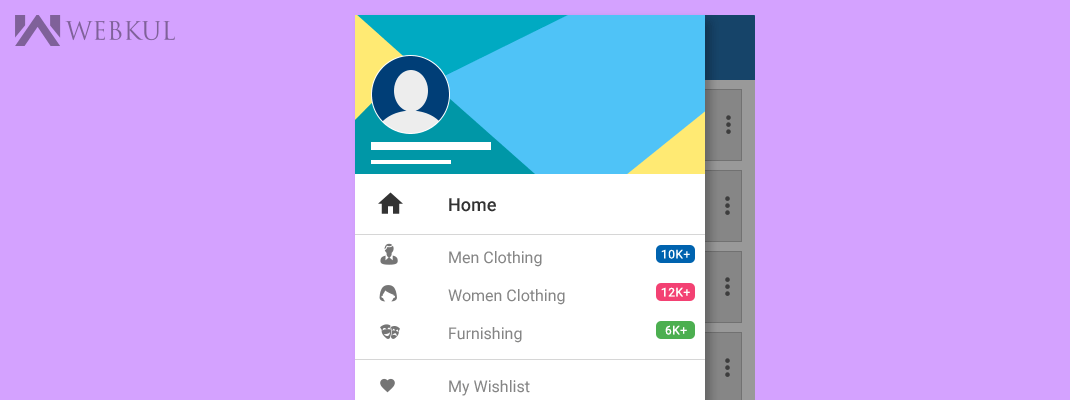
NavigationView makes it very easy to make a good looking material design Navigation drawer. This NavigationView is used as the replacement of existing ListView, ExpandableListView and other that were used to create a navigation menu.
Here is the Material Design Support Library that provide an all new Widget, called as NavigationView .
compile ‘com.android.support:design:22.2.0
The advantage of using NavigationView over traditional approach is the ease in which menu can be created.
There are 2 ways to implement a NavigationView, we will see both the ways.
- Design time, by preparing menu file with the items
- Run time, by adding items into the Navigation view programatically
We are creating NavigationView at Design time.
All we need to do is:
- Create drawer layout containg NavigationView.
- Create menu that is used to display NavigationMenu.
- Add Header View for the Navigation View. We will find out what is header view in NavigationView in this post later.
- Finally, Initialize Views in our Activity and setNavigationItemSelectedListener to handle click event on Navigaiton MenuItem.
Let us begin creating NavigationView for our application
i. Create layout for the Activity.
NavigationView is added as a child in the DrawerLayout where we want to display it.
activity_main.xml
|
1 2 3 4 5 6 7 8 9 10 11 12 13 14 15 16 17 18 19 20 21 22 23 24 25 26 27 28 29 30 31 32 33 34 35 36 37 |
<?xml version="1.0" encoding="utf-8"?> <android.support.v4.widget.DrawerLayout xmlns:android="http://schemas.android.com/apk/res/android" xmlns:app="http://schemas.android.com/apk/res-auto" android:id="@+id/drawer_layout" android:layout_width="match_parent" android:layout_height="match_parent"> //Content Pane as the first child of the DrawerLayout <LinearLayout android:layout_width="match_parent" android:layout_height="match_parent" android:orientation="vertical"> <android.support.v7.widget.Toolbar android:id="@+id/toolbar" android:layout_width="match_parent" android:layout_height="?actionBarSize" android:background="?attr/colorPrimary" android:elevation="4dp" app:popupTheme="@style/ThemeOverlay.AppCompat.Light" /> <FrameLayout android:id="@+id/fragment" android:layout_width="match_parent" android:layout_height="match_parent" /> </LinearLayout> // Navigation View as the second child of the DrawerLayout <android.support.design.widget.NavigationView android:id="@+id/navigation_view" android:layout_width="wrap_content" android:layout_height="match_parent" android:layout_gravity="start" app:menu="@menu/customer_menu" app:headerLayout="@layout/navigation_header_view" /> </android.support.v4.widget.DrawerLayout> |
ii. Creating Menu that is used as a menu to be displayed in NavigationMenu
NavigationMenu is just a simple menu that can be added in the view through XML or dynamically at the run time.
We have added customer_menu.xml as a menu that is displayed in the NavigationView by using app:menu property of NavigationView.
app:menu=”@menu/customer_menu”
customer_menu.xml
|
1 2 3 4 5 6 7 8 9 10 11 12 13 14 15 16 17 18 19 20 21 22 23 24 25 26 27 28 29 30 31 32 33 34 35 36 37 38 39 |
<?xml version="1.0" encoding="utf-8"?> <menu xmlns:android="http://schemas.android.com/apk/res/android"> <group android:id="@+id/customer_menu" android:checkableBehavior="single"> <item android:id="@+id/home" android:icon="@drawable/ic_home" android:title="@string/home" /> <item android:id="@+id/dashboard" android:icon="@drawable/ic_dash26" android:title="@string/dashboard_action_title" /> <item android:id="@+id/mywishlist" android:icon="@drawable/ic_wishlist26" android:title="@string/mywishlist_action_title" /> <item android:id="@+id/myorders" android:icon="@drawable/ic_order" android:title="@string/myorder_action_title" /> <item android:id="@+id/myproreview" android:icon="@drawable/ic_star" android:title="@string/myproreview_action_title" /> <item android:id="@+id/accountinfo" android:icon="@drawable/ic_acc_info" android:title="@string/accountinfo_action_title" /> <item android:id="@+id/addrbook" android:icon="@drawable/ic_book26" android:title="@string/addrbook_action_title" /> <item android:id="@+id/mydownloads" android:icon="@drawable/ic_down26" android:title="@string/mydownloads_action_title" /> </group> </menu> |
iii. Adding Header View for the Navigation View.
Another cool thing about NavigationView is support for the HeaderView. We can pass any custom header for our HeaderView of NavigationView.
app:headerLayout=”@layout/navigation_header_view”
navigation_header_view.xml
|
1 2 3 4 5 6 7 8 9 10 11 12 13 14 15 16 17 18 19 20 21 22 23 24 25 26 27 28 29 30 31 32 33 34 35 36 37 38 39 40 41 42 43 44 45 46 |
<?xml version="1.0" encoding="utf-8"?> <RelativeLayout xmlns:android="http://schemas.android.com/apk/res/android" android:layout_width="match_parent" android:layout_height="190dp" android:background="@drawable/banner_navigation_header_view"> <de.hdodenhof.circleimageview.CircleImageView xmlns:app="http://schemas.android.com/apk/res-auto" android:id="@+id/profile_image" android:layout_width="76dp" android:layout_height="76dp" android:layout_alignParentBottom="true" android:layout_alignParentLeft="true" android:layout_marginBottom="8dp" android:layout_marginLeft="24dp" android:layout_marginStart="24dp" android:src="@drawable/profile_picture" app:border_color="#FF000000" /> <TextView android:id="@+id/username" android:layout_width="match_parent" android:layout_height="wrap_content" android:layout_above="@+id/email" android:layout_toRightOf="@id/profile_image" android:onClick="changeNavigationMenu" android:padding="4dp" android:text="John Doe" android:textColor="#FFF" android:textSize="14sp" android:textStyle="bold" /> <TextView android:id="@+id/email" android:layout_width="wrap_content" android:layout_height="wrap_content" android:layout_alignLeft="@+id/username" android:layout_alignParentBottom="true" android:layout_alignStart="@+id/username" android:layout_marginBottom="8dp" android:gravity="left" android:padding="4dp" android:text="test@webkul.com" android:textColor="#fff" android:textSize="14sp" /> </RelativeLayout> |
for Circle Image Library (Add the dependency mentioned below)
compile ‘de.hdodenhof:circleimageview:1.3.0’
iv. Time to intialize all our views in the activity where we want to display the NavigationView.
|
1 2 3 4 5 6 7 8 9 10 11 12 13 14 15 16 17 18 19 20 21 22 23 24 25 26 27 28 29 30 31 32 33 34 35 36 |
mDrawerLayout = (DrawerLayout) findViewById(R.id.drawer_layout); navigationView = (NavigationView) findViewById(R.id.navigation_view); navigationMenu = navigationView.getMenu(); navigationView.setNavigationItemSelectedListener(mOnNavigationItemSelectedListener); private NavigationView.OnNavigationItemSelectedListener mOnNavigationItemSelectedListener = new NavigationView.OnNavigationItemSelectedListener() { @Override public boolean onNavigationItemSelected(MenuItem menuItem) { mDrawerLayout.closeDrawer(GravityCompat.START); if (menuItem.getItemId() == R.id.home) { Toast.makeText(getApplicationContext(), "home", Toast.LENGTH_SHORT).show(); } if (menuItem.getItemId() == R.id.dashboard) { Toast.makeText(getApplicationContext(), "dashboard", Toast.LENGTH_SHORT).show(); } else if (menuItem.getItemId() == R.id.mywishlist) { Toast.makeText(getApplicationContext(), "mywishlist", Toast.LENGTH_SHORT).show(); } else if (menuItem.getItemId() == R.id.myorders) { Toast.makeText(getApplicationContext(), "myorders", Toast.LENGTH_SHORT).show(); } else if (menuItem.getItemId() == R.id.myproreview) { Toast.makeText(getApplicationContext(), "myordmyproreviewers", Toast.LENGTH_SHORT).show(); } else if (menuItem.getItemId() == R.id.accountinfo) { Toast.makeText(getApplicationContext(), "accountinfo", Toast.LENGTH_SHORT).show(); } else if (menuItem.getItemId() == R.id.addrbook) { Toast.makeText(getApplicationContext(), "addrbook", Toast.LENGTH_SHORT).show(); } else if (menuItem.getItemId() == R.id.mydownloads) { Toast.makeText(getApplicationContext(), "mydownloads", Toast.LENGTH_SHORT).show(); } return true; } }; |
