We will start with the small introduction with Auto layout Constraints in Swift.
AutoLayout is a system that makes it easy to support multiple screen sizes with just one interface by making the same interface react to changes. AutoLayout is a constraint-based layout system that gives developers the ability to create interfaces that respond to the changes in screen size and device orientation.
Without using auto layout, it would be very hard for you to create an app that supports all screen resolutions.
Auto layout Constraints in Swift using Interface Builder
Setting up the constraints through Interface Builder
Create a new Xcode project. Select Single view app.
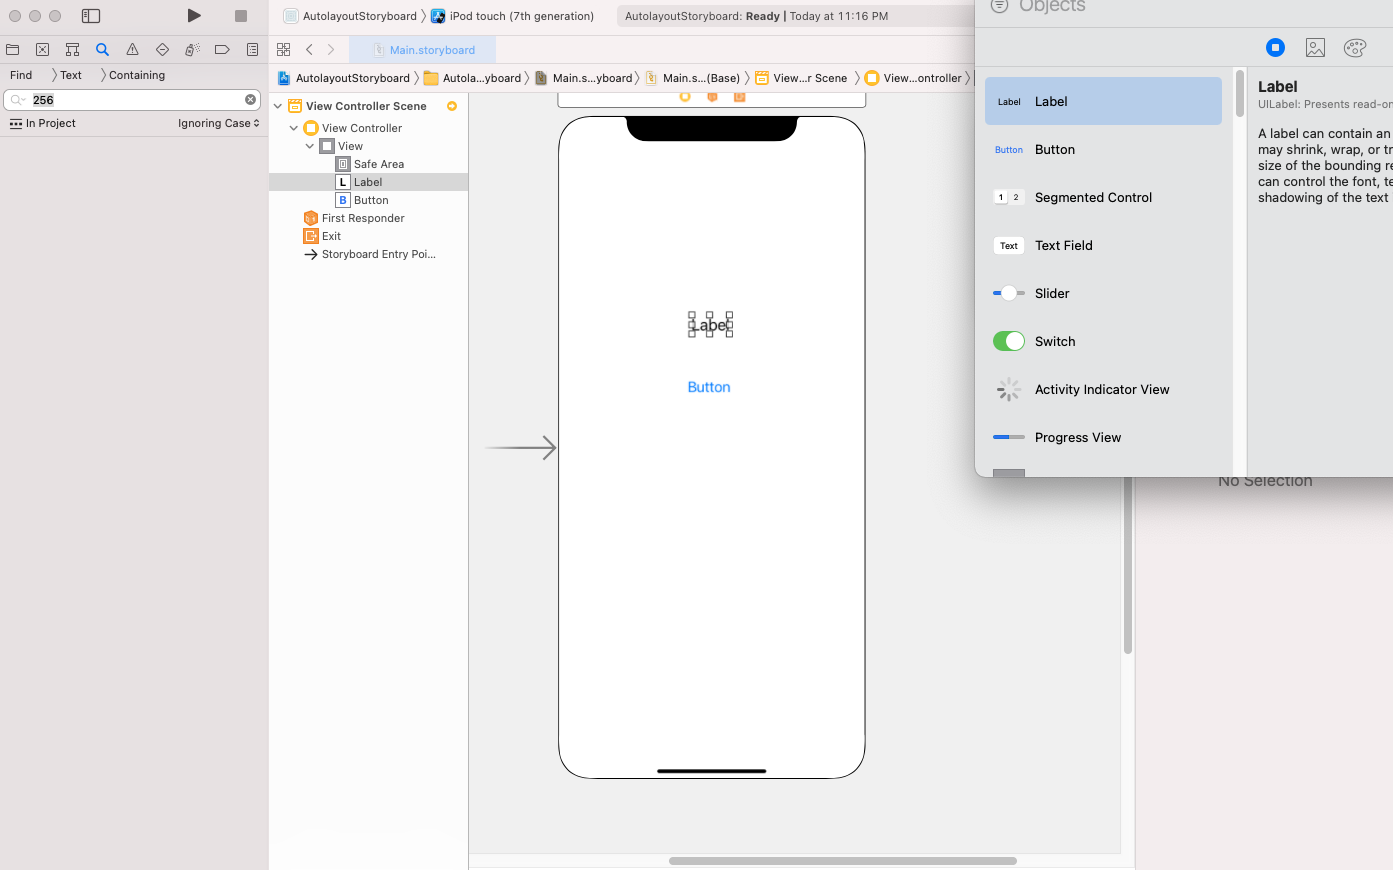
Open Main.storyboard and add a few elements from the library. Drag the following onto the view controller:
- Label
- Button

- Select Button (Tap) and open Align menu and check Horizontally in Container and Vertically in Container, then click on Add 2 constraint.
- Now, Select Label(Hello world) and open Add new Constraint menu on the bottom-right and enter 20 to make a 20-point constraint to its nearest bottom neighbor and check Horizontally in Container


3. Now, select both buttons at the same time and, in the Align menu, check Leading Edges.


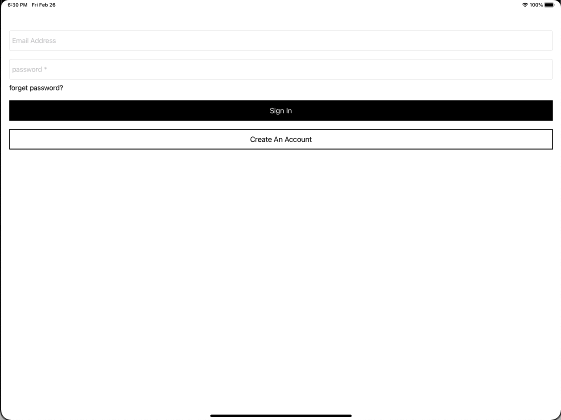
Now check the app in different size screen.
Implementing Auto Layout Constraints in Swift programatically
There are different techniques you can use when implementing Auto Layout programmatically.
Writing constraints by using Layout Anchors
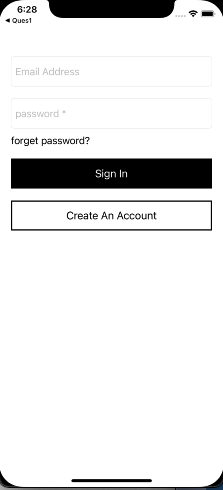
Let’s create a sign- in page.
First of all, we need to set the all fields to translatesAutoresizingMaskIntoConstraints equals to false. This is to prevent the view’s auto-resizing mask to be translated into Auto Layout constraints and affecting your constraints.
|
1 2 3 4 5 6 7 8 9 |
emailtextfield.translatesAutoresizingMaskIntoConstraints = false passwordtextfield.translatesAutoresizingMaskIntoConstraints = false forgetpass.translatesAutoresizingMaskIntoConstraints = false signIn.translatesAutoresizingMaskIntoConstraints = false createaccount.translatesAutoresizingMaskIntoConstraints = false |
After that, you start by set constraints. we use NSLayoutConstraint to set the constraints. The NSLayoutConstraint class defines a relationship between two objects.
|
1 2 3 4 5 6 7 8 9 10 11 12 13 14 15 16 17 18 19 20 21 22 23 24 25 26 27 28 29 30 31 32 33 34 35 |
override func viewDidLayoutSubviews() { // do it here, after constraints have been materialized NSLayoutConstraint.activate([ emailtextfield.leadingAnchor.constraint(equalTo: view.safeAreaLayoutGuide.leadingAnchor, constant: 20), emailtextfield.trailingAnchor.constraint(equalTo: view.safeAreaLayoutGuide.trailingAnchor, constant: -20), emailtextfield.topAnchor.constraint(equalTo: view.safeAreaLayoutGuide.topAnchor, constant: 50), emailtextfield.heightAnchor.constraint(equalToConstant: 50), // emailtextfield.centerYAnchor.constraint(equalTo: view.safeAreaLayoutGuide.centerYAnchor), passwordtextfield.leadingAnchor.constraint(equalTo: view.safeAreaLayoutGuide.leadingAnchor, constant: 20), passwordtextfield.trailingAnchor.constraint(equalTo: view.safeAreaLayoutGuide.trailingAnchor, constant: -20), passwordtextfield.topAnchor.constraint(equalTo: emailtextfield.bottomAnchor, constant: 20), passwordtextfield.heightAnchor.constraint(equalToConstant: 50), // passwordtextfield.centerYAnchor.constraint(equalTo: view.safeAreaLayoutGuide.centerYAnchor) forgetpass.leadingAnchor.constraint(equalTo: view.safeAreaLayoutGuide.leadingAnchor, constant: 20), forgetpass.trailingAnchor.constraint(equalTo: view.safeAreaLayoutGuide.trailingAnchor, constant: -20), forgetpass.topAnchor.constraint(equalTo: passwordtextfield.bottomAnchor , constant: 10), signIn.leadingAnchor.constraint(equalTo: view.safeAreaLayoutGuide.leadingAnchor, constant: 20), signIn.trailingAnchor.constraint(equalTo: view.safeAreaLayoutGuide.trailingAnchor, constant: -20), signIn.topAnchor.constraint(equalTo: forgetpass.bottomAnchor, constant: 20), signIn.heightAnchor.constraint(equalToConstant: 50), createaccount.leadingAnchor.constraint(equalTo: view.safeAreaLayoutGuide.leadingAnchor, constant: 20), createaccount.trailingAnchor.constraint(equalTo: view.safeAreaLayoutGuide.trailingAnchor, constant: -20), createaccount.topAnchor.constraint(equalTo: signIn.bottomAnchor, constant: 20), createaccount.heightAnchor.constraint(equalToConstant: 50) ]) } |
LayoutAnchor
LayoutAnchor represents a single constraint, which can be either constant (e.g., fixed-width or height), or relative to another constraint (e.g., leading or trailing).
When activating or deactivating lots of constraints at once, it’s more efficient to pass them as an array to activate() and deactivate() respectively.
Now, run the app.