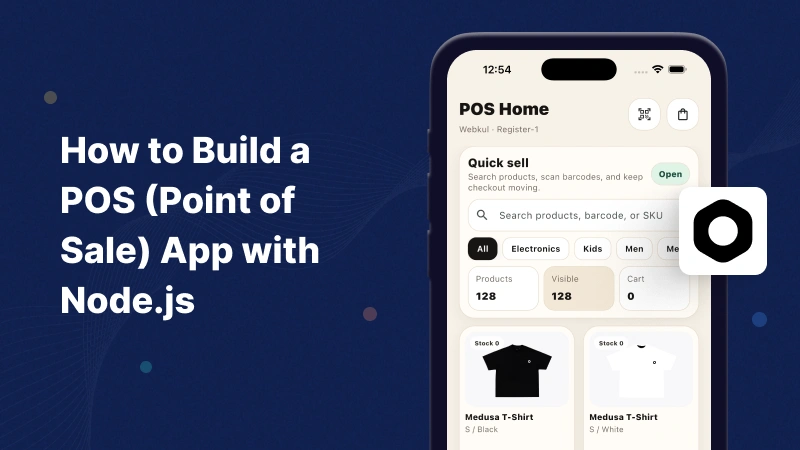
In this blog, we will learn how to build a POS App with Node.js using Medusa JS and Flutter.
Introduction
A Point of Sale (POS) application is an essential tool for retail stores, restaurants, supermarkets, and businesses that need to manage sales, inventory, customers, and payments efficiently.
Modern POS systems help businesses streamline checkout operations, track inventory in real time, generate sales reports, and manage customer information from a centralized platform.
What is a POS App?
A Point of Sale (POS) application is software that enables businesses to process customer purchases, manage inventory, track sales, and generate reports.
A POS system typically includes:
- Product Management
- Inventory Tracking
- Customer Management
- Order Processing
- Payment Management
- Sales Reporting
- Barcode Scanning
- Receipt Generation
Medusa offers modular commerce APIs, workflows, and extensibility that simplify POS development.
Learn more about Medusa in its official documentation.
How Does It Work?
The POS application communicates with the Medusa backend through custom POS APIs.
The backend handles:
- Catalog and Inventory Management
- Checkout and Order Processing
- Barcode-Based Product Lookup
- Sales Reporting
The Flutter mobile application sends API requests to the backend and receives JSON responses that can be rendered in the POS interface.
Why Use Medusa for POS Development?
High Performance & Modular Architecture
Medusa provides a flexible backend structure that allows developers to easily build and customize POS features such as product management, barcode scanning, checkout, and inventory tracking.
Real-Time Inventory Updates
Inventory levels are automatically updated after every completed transaction, ensuring accurate stock visibility.
Cross-Platform Support
A single Medusa backend can power Android, iOS, web, and desktop POS applications simultaneously.
Features of the POS App
The POS application can include the following features:
- Secure Staff Authentication (Cashier Login)
- Register Session Management (Open/Close Cash Drawer)
- Product Catalog & Search
- Barcode Scanning
- Inventory Tracking
- Shopping Cart Management
- Hold and Resume Carts (Held Carts)
- Customer Management (Attach/Create Customers)
- Checkout & Multiple Payment Methods
- PDF Invoice Generation & Printing
What We Are Building
We will build a simple cashier-focused POS workflow consisting of:
Medusa JS Backend
Custom APIs for:
- Product Catalog Retrieval
- Barcode-Based Product Lookup
Flutter Mobile App
A responsive mobile application that:
- Displays available products
- Supports product searching
- Scans product barcodes
- Retrieves product information from Medusa APIs
Prerequisites
- Node.js 20 or later
- PostgreSQL
- Flutter SDK
- Medusa JS CLI
- Android Studio or Xcode
- VS Code
Backend Development
In this section, we will create the APIs required to retrieve product data and perform barcode-based product lookups.
Step 1: Initialize the Medusa JS Backend
Create a new Medusa application:
|
1 |
npx create-medusa-app@latest pos-backend |
Navigate to the project:
|
1 |
cd pos-backend |
Medusa automatically sets up the required commerce modules and database configuration.
Step 2: Create a Catalog API
|
1 2 3 4 5 6 7 8 9 10 11 12 13 14 15 16 17 18 19 20 21 |
import { MedusaRequest, MedusaResponse, } from "@medusajs/framework/http"; export async function GET( req: MedusaRequest, res: MedusaResponse ) { const catalog = [ { id: "prod_1", title: "Medusa T-Shirt", sku: "MEDUSA-TSHIRT-M", price: 15.00, barcode: "123456789012", }, ]; res.json({ catalog }); } |
This endpoint returns product information that can be displayed in the POS application, including product name, SKU, price, and barcode details.
Step 3: Create a Barcode Lookup API
|
1 2 3 4 5 6 7 8 9 10 11 12 13 14 15 16 17 18 19 20 21 22 23 24 25 26 27 28 29 30 |
import { MedusaRequest, MedusaResponse, } from "@medusajs/framework/http"; export async function GET( req: MedusaRequest, res: MedusaResponse ) { const { barcode } = req.query; if (!barcode) { return res.status(400).json({ message: "Barcode query parameter is required" }); } // Lookup the specific variant matching the scanned barcode. // In a production application, query the Medusa Product Module. const variant = { id: "variant_1", title: "M / White", product_id: "prod_1", sku: "MEDUSA-TSHIRT-M", price: 15.00, barcode: barcode }; res.json({ variant }); } |
This endpoint accepts a barcode and returns the matching product variant from the Medusa catalog.
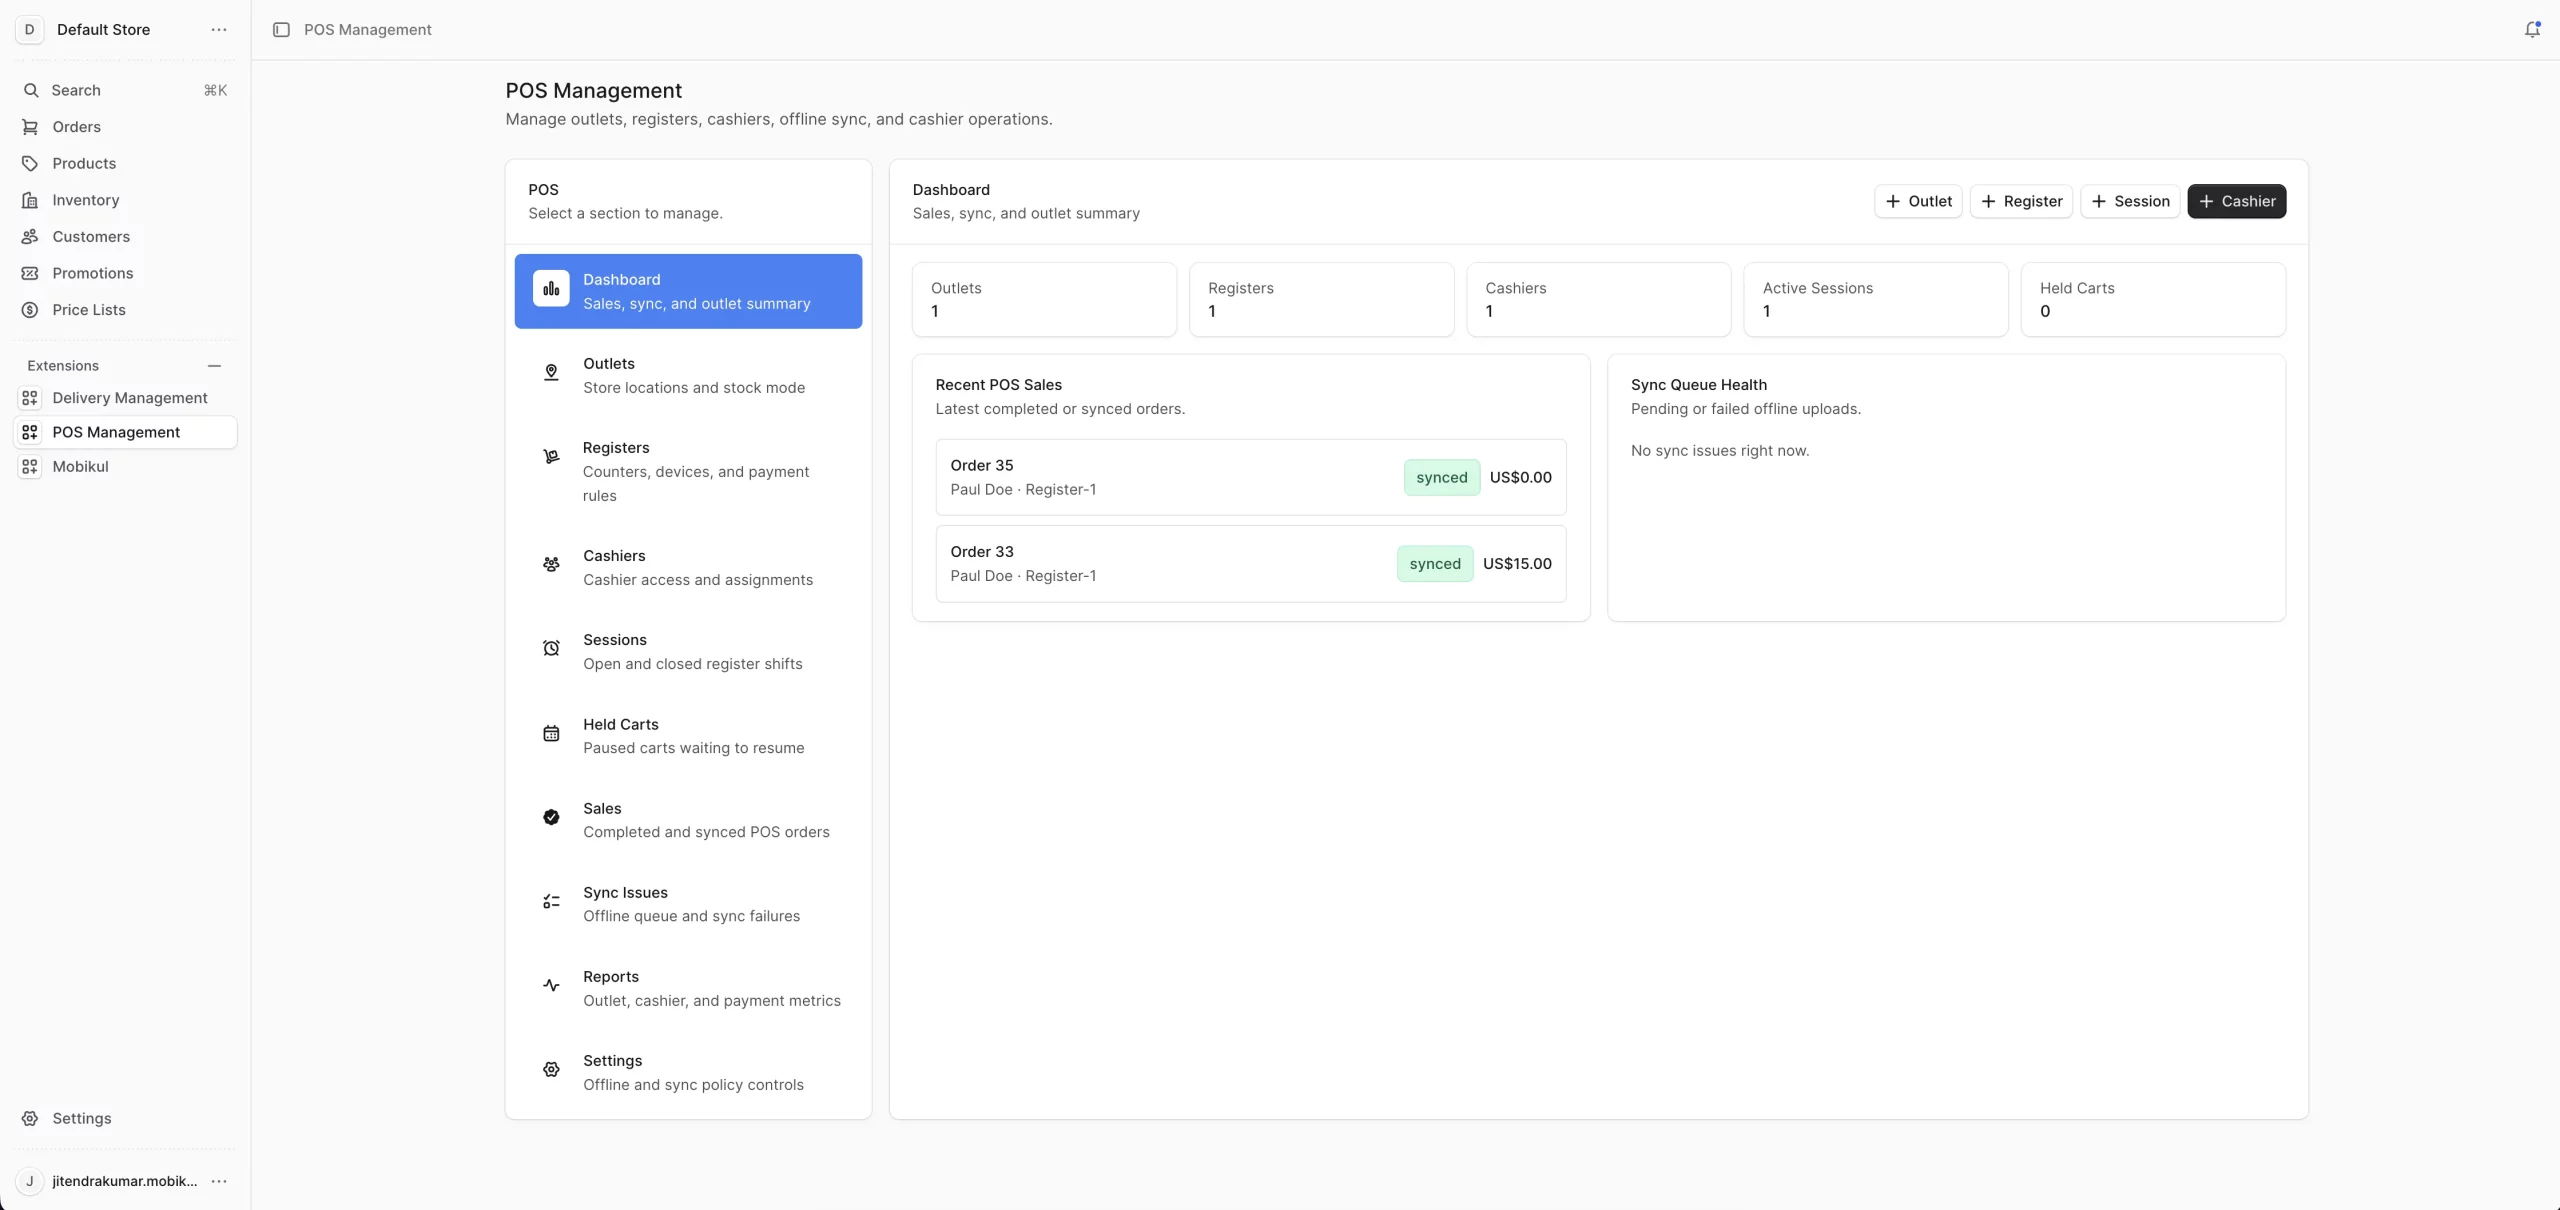
Backend Dashboard Output
Flutter POS Application Development
In this section, we will connect the application to the Medusa backend, implement barcode scanning, and display product information for cashiers.
Step 1: Create the Flutter Application
Create a new Flutter project:
|
1 |
flutter create pos_mobile_app |
|
1 |
cd pos_mobile_app |
Add required packages to pubspec.yaml:
|
1 2 3 4 5 6 |
dependencies: flutter: sdk: flutter dio: ^5.9.0 mobile_scanner: ^6.0.11 |
Install packages:
|
1 |
flutter pub get |
Step 2: Configure API Communication
|
1 2 3 4 5 6 7 8 9 10 11 12 13 14 15 16 17 18 19 20 21 22 23 24 25 26 27 28 29 30 31 32 |
import 'package:dio/dio.dart'; class CatalogRemoteDataSource { const CatalogRemoteDataSource(this._dio); final Dio _dio; // Retrieve the POS product catalog Future<List<Map<String, dynamic>>> fetchCatalog({String query = ''}) async { final response = await _dio.get<Map<String, dynamic>>( '/pos/catalog', queryParameters: <String, dynamic>{ 'limit': 250, if (query.trim().isNotEmpty) 'q': query.trim(), }, ); final catalog = response.data?['catalog'] as List<dynamic>? ?? const <dynamic>[]; return catalog.map((item) => Map<String, dynamic>.from(item as Map)).toList(); } // Lookup scanned barcode in Medusa JS Future<Map<String, dynamic>?> lookupBarcode(String barcode) async { final response = await _dio.get<Map<String, dynamic>>( '/pos/catalog/barcode', queryParameters: <String, dynamic>{'barcode': barcode}, ); final variant = response.data?['variant']; return variant != null ? Map<String, dynamic>.from(variant as Map) : null; } } |
Step 3: Implement Barcode Scanning
Create a barcode scanner screen using the mobile_scanner
|
1 2 3 4 5 6 7 8 9 10 11 12 13 14 15 16 17 18 19 20 21 22 23 24 25 26 27 28 29 30 31 32 33 34 35 36 37 38 |
import 'package:flutter/material.dart'; import 'package:mobile_scanner/mobile_scanner.dart'; class BarcodeScannerScreen extends StatefulWidget { const BarcodeScannerScreen({super.key}); @override State<BarcodeScannerScreen> createState() => _BarcodeScannerScreenState(); } class _BarcodeScannerScreenState extends State<BarcodeScannerScreen> { bool _handled = false; @override Widget build(BuildContext context) { return Scaffold( appBar: AppBar( title: const Text('Scan Barcode'), ), body: MobileScanner( onDetect: (capture) { if (_handled) return; // Prevent StateError by safely checking if barcodes list is empty final code = capture.barcodes.isEmpty ? null : capture.barcodes.first.rawValue; if (code != null && code.isNotEmpty) { _handled = true; // Pop the scanned value back to the previous screen Navigator.pop(context, code); } }, ), ); } } |
Step 4: Connect Scanner to Product Catalog UI
In the cashier catalog view, add a scan action button that opens the scanner and adds the resolved product to the cart.
|
1 2 3 4 5 6 7 8 9 10 11 12 13 14 15 16 17 18 19 |
// Launch scanner screen and wait for the code final scannedBarcode = await Navigator.push<String>( context, MaterialPageRoute(builder: (_) => const BarcodeScannerScreen()), ); if (scannedBarcode != null) { // Call the Medusa API to resolve the barcode final productVariant = await catalogDataSource.lookupBarcode(scannedBarcode); if (productVariant != null) { // Add the found variant to the cashier shopping cart cartBloc.add(CartItemAdded(productVariant)); } else { ScaffoldMessenger.of(context).showSnackBar( const SnackBar(content: Text('Product not found for this barcode.')), ); } } |
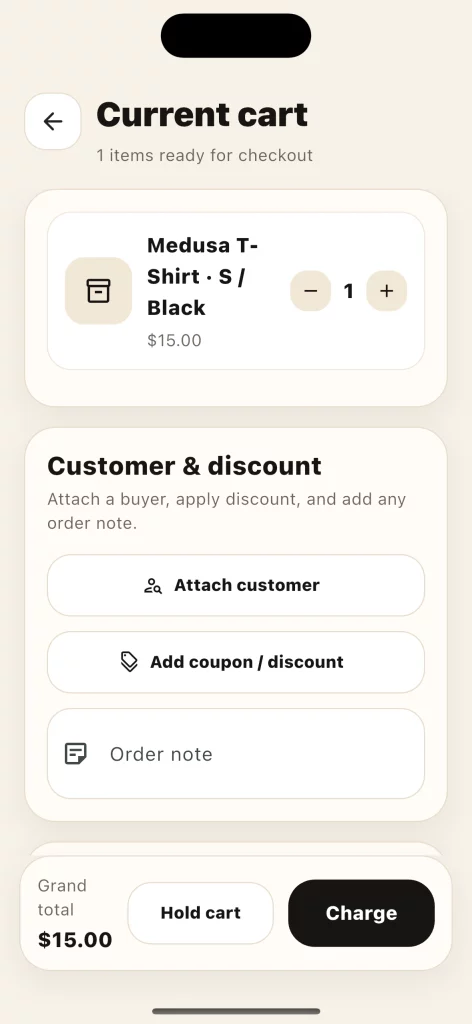
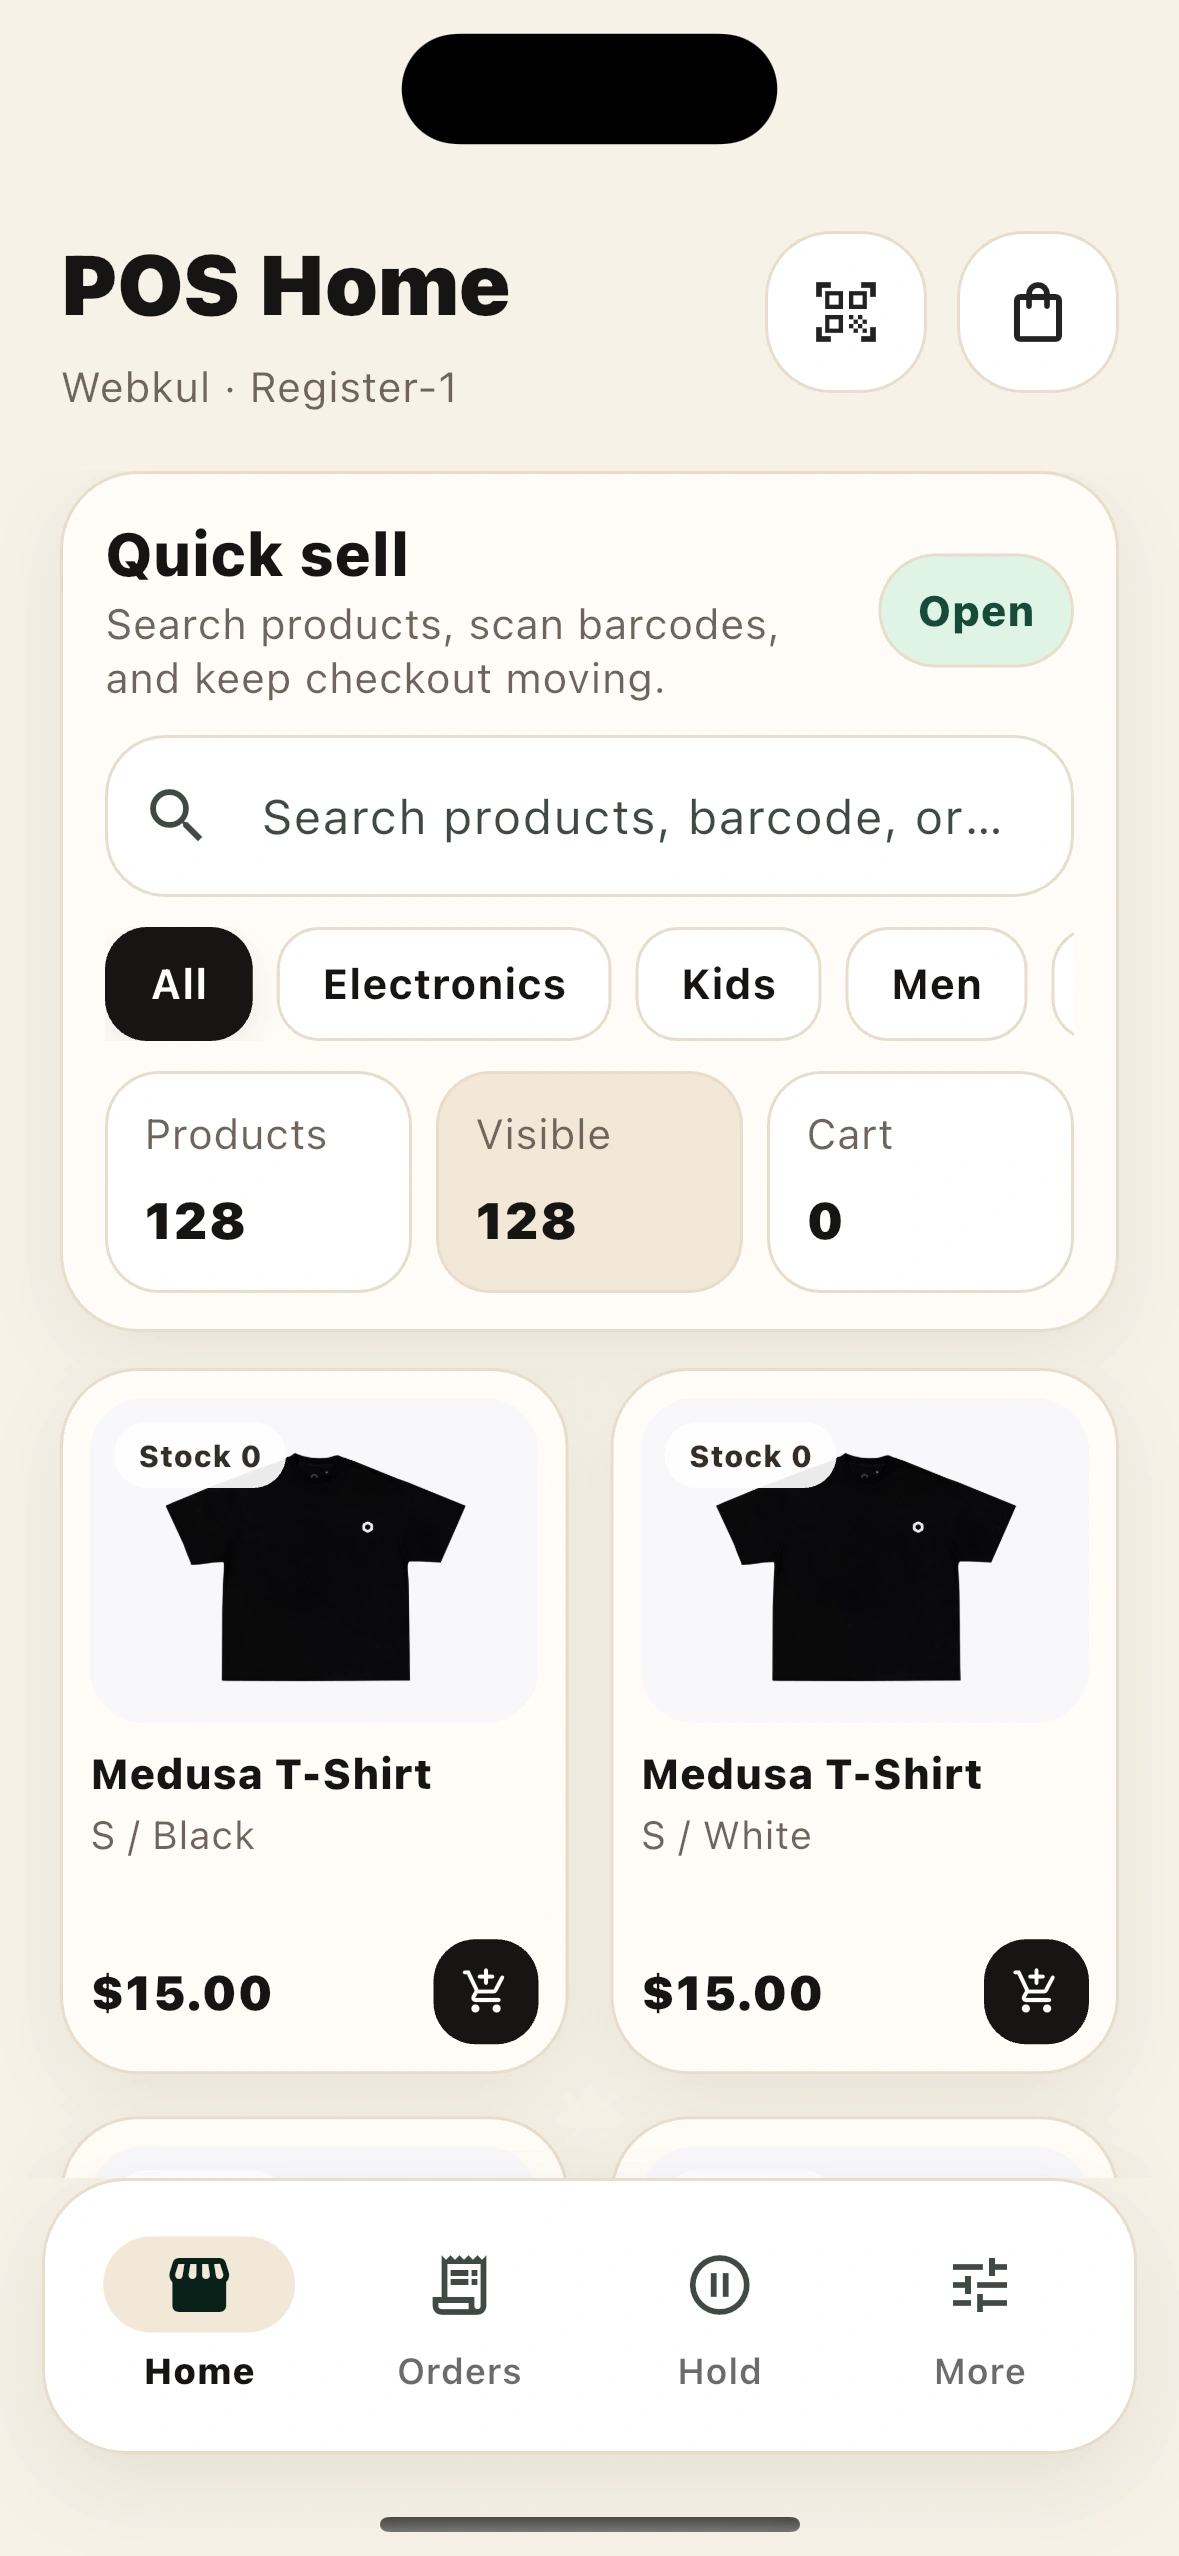
POS Mobile Application Output
Medusa POS Application
Access the complete product catalog, search items, and filter by categories.
Manage active carts, attach customer details, apply discounts, and process payments.
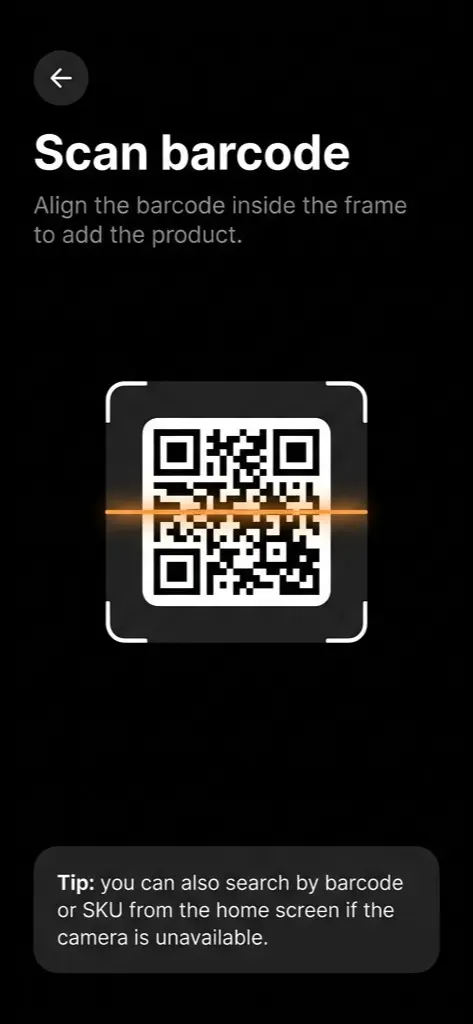
Scan product barcodes with the camera for instant lookup and fast checkout.


Conclusion
Medusa JS provides a flexible foundation for building a POS App with Node.js, offering features such as product management, barcode scanning, and inventory tracking.
This approach simplifies POS development and supports applications across multiple platforms.
You can also explore other informative blogs on Mobikul for more knowledge.