In this guide, we will learn how to build a mobile app with Medusa JS.
Introduction
Medusa JS is an open-source commerce platform built with Node.js that provides commerce modules, APIs, workflows, and development tools for building modern commerce applications.
It helps manage products, customers, carts, orders, payments, inventory, and other commerce operations through a flexible and extensible backend.
Your application communicates with Medusa through APIs, keeping the frontend and backend separate for easier development and maintenance.
What is Medusa JS?
Medusa JS is an open-source commerce platform built with Node.js that combines commerce modules, APIs, workflows, and development tools for building custom commerce applications.
It includes an Admin Dashboard for managing store operations and exposes Store APIs that developers can use to build custom web, mobile, and commerce experiences.
Explore more about Medusa JS on its official documentation.
How Does It Work?
The Medusa backend runs on Node.js and uses PostgreSQL for data storage.
The mobile application sends HTTP requests to Medusa’s Store APIs, which return commerce data in JSON format that can be rendered in the app.
Why Use Medusa for Mobile Apps?
There are several advantages of using Medusa for mobile development:
- Faster Development: Medusa provides commerce modules and APIs for products, carts, orders, and checkout, allowing you to focus on building the UI.
- One Backend, Multiple Apps: The same Medusa backend powers your iOS app, Android app, and website.
This approach makes it easier to build a mobile app with Medusa JS without handling complex backend logic yourself.
What We Are Building
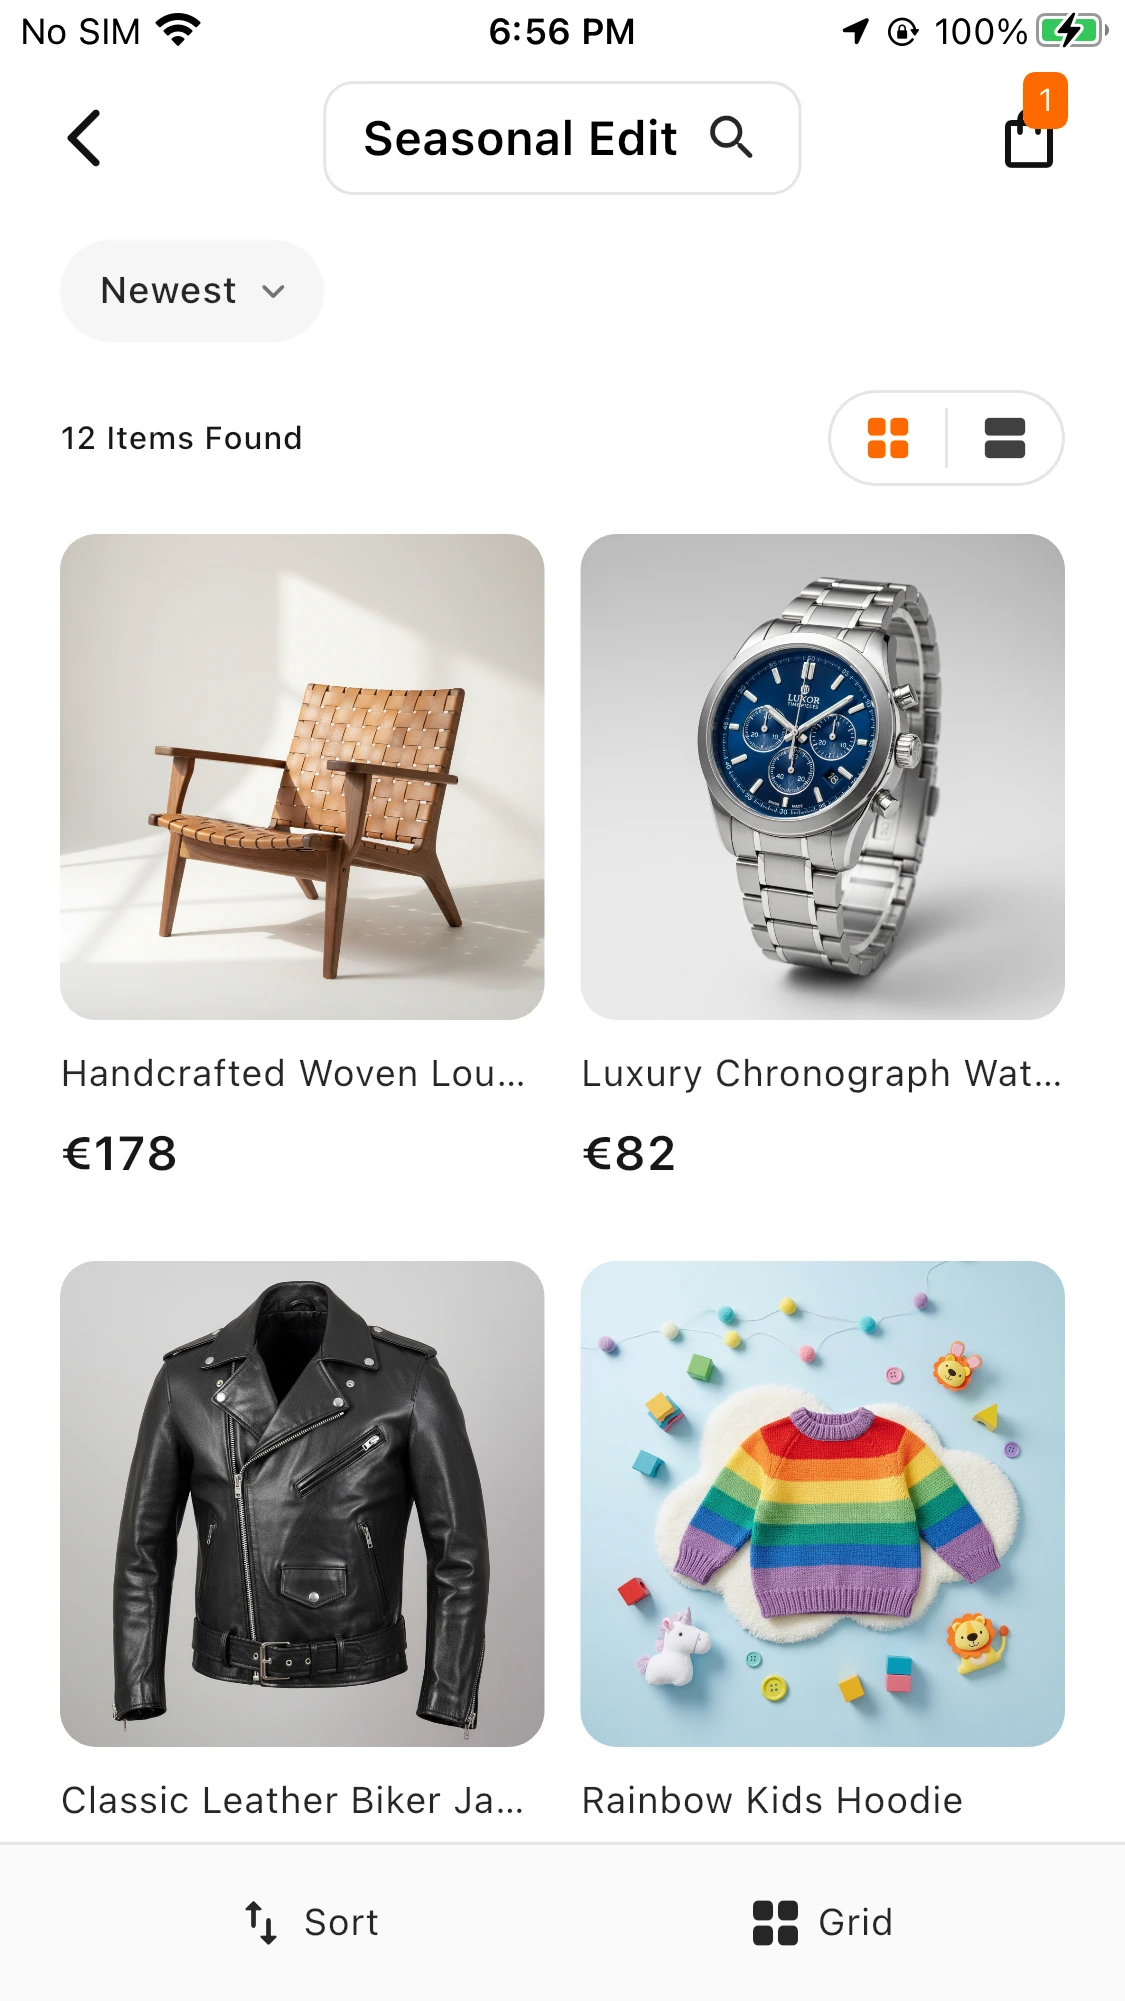
We are building a simple product listing page in Flutter. The app connects to Medusa, fetches all products, and displays them in a grid with images, titles, and prices.
Prerequisites
-
Node.js 20 or later
-
PostgreSQL
-
Flutter SDK
-
Android Studio or Xcode
- VS Code
Step 1: Set Up Medusa Backend
Create a new Medusa project:
|
1 |
npx create-medusa-app@latest my-medusa-store |
Start the backend:
|
1 2 |
cd my-medusa-store/apps/backend npx medusa develop |
In the Admin Dashboard, add products and generate a Publishable API Key for accessing the Store APIs.
Step 2: Create Flutter App
At this stage, we begin building the Flutter frontend for Medusa JS, allowing seamless communication with the backend.
|
1 2 |
flutter create medusa_mobile_app cd medusa_mobile_app |
Add required dependencies in pubspec.yaml:
|
1 2 3 4 5 6 7 8 |
dependencies: flutter: sdk: flutter dio: ^5.9.0 flutter_bloc: ^9.1.1 go_router: ^16.0.0 flutter_dotenv: ^5.2.1 flutter_secure_storage: ^9.2.4 |
Install dependencies:
|
1 |
flutter pub get |
Step 3: Configure Environment
To configure the project, create a .env file in the root directory:
|
1 2 |
MEDUSA_BASE_URL=http://10.0.2.2:9000 MEDUSA_PUBLISHABLE_API_KEY=your_api_key_here |
Create environment helper (lib/config/env.dart):
|
1 2 3 4 5 6 7 8 9 10 |
import 'package:flutter_dotenv/flutter_dotenv.dart'; class AppEnv { static Future<void> load() async { await dotenv.load(fileName: '.env'); } static String get baseUrl => dotenv.env['MEDUSA_BASE_URL'] ?? ''; static String get publishableApiKey => dotenv.env['MEDUSA_PUBLISHABLE_API_KEY'] ?? ''; } |
Step 4: Create Product Service
For API communication, we define a ProductService that fetches product data from Medusa’s Store APIs.
|
1 2 3 4 5 6 7 8 9 10 11 12 13 14 |
import 'package:dio/dio.dart'; import '../config/env.dart'; class ProductService { final Dio _dio = Dio(BaseOptions( baseUrl: AppEnv.baseUrl, headers: {'x-publishable-api-key': AppEnv.publishableApiKey}, )); Future<List<dynamic>> fetchProducts() async { final response = await _dio.get('/store/products'); return response.data['products']; } } |
Step 5: Create the Product Listing Screen
The product listing screen displays data fetched from Medusa’s Store API.
|
1 2 3 4 5 6 7 8 9 10 11 12 13 14 15 16 17 18 19 20 21 22 23 24 25 26 27 28 29 30 31 32 33 34 35 36 37 38 39 40 41 42 43 44 45 46 47 48 49 50 51 52 53 54 55 56 57 58 59 60 61 62 63 64 65 66 67 68 69 70 71 72 73 74 75 76 77 78 79 80 81 82 83 84 85 86 87 88 89 90 91 92 93 94 95 96 97 98 99 |
import 'package:flutter/material.dart'; import '../services/product_service.dart'; import '../config/env.dart'; class ProductListScreen extends StatefulWidget { @override State<ProductListScreen> createState() => _ProductListScreenState(); } class _ProductListScreenState extends State<ProductListScreen> { List<dynamic> _products = []; bool _loading = true; @override void initState() { super.initState(); _loadProducts(); } Future<void> _loadProducts() async { await AppEnv.load(); final service = ProductService(); final products = await service.fetchProducts(); setState(() { _products = products; _loading = false; }); } @override Widget build(BuildContext context) { if (_loading) { return Scaffold( body: Center( child: CircularProgressIndicator(), ), ); } return Scaffold( appBar: AppBar( title: const Text('Products'), backgroundColor: Colors.teal, ), body: GridView.builder( padding: const EdgeInsets.all(12), gridDelegate: const SliverGridDelegateWithFixedCrossAxisCount( crossAxisCount: 2, childAspectRatio: 0.7, crossAxisSpacing: 10, mainAxisSpacing: 10, ), itemCount: _products.length, itemBuilder: (context, index) { final product = _products[index]; return Card( child: Column( crossAxisAlignment: CrossAxisAlignment.start, children: [ Expanded( child: Image.network( product['thumbnail'] ?? '', width: double.infinity, fit: BoxFit.cover, ), ), Padding( padding: const EdgeInsets.all(8), child: Text( product['title'] ?? '', maxLines: 2, overflow: TextOverflow.ellipsis, style: const TextStyle( fontWeight: FontWeight.bold, ), ), ), Padding( padding: const EdgeInsets.symmetric( horizontal: 8, vertical: 4, ), child: Text( '\${product['variants'][0]['prices'][0]['amount']}', style: const TextStyle( fontWeight: FontWeight.w600, ), ), ), ], ), ); }, ), ); } } |
Step 6: Update Main File
Update lib/main.dart:
|
1 2 3 4 5 6 7 |
import 'package:flutter/material.dart'; import 'screens/product_list.dart'; void main() => runApp(MaterialApp( home: ProductListScreen(), debugShowCheckedModeBanner: false, )); |
Run Your App
Start the Medusa server:
Output
How to Build a Mobile App with Medusa JS
Fetch products from Medusa’s Store API and display them in a clean Flutter GridView.
Conclusion
Medusa JS streamlines mobile e-commerce app development with reusable commerce modules, APIs, and development tools, allowing developers to focus on building scalable and user-friendly applications.
If you need expert Medusa development services, contact our team to build a secure, flexible, and future-ready commerce solution for your business.
You can extend the app with features like cart, checkout, and authentication for a scalable solution.
You can also explore other informative blogs on Mobikul for more knowledge.
Thanks for reading!