A Little Explanation of AutoCompleteTextView
An editable text view or in other words AutoCompleteTextView that shows completion suggestions automatically while the user is typing any related content. The list of suggestions is displayed in a drop-down menu like a spinner from which the user can choose an item to replace the content of the edit box.
The drop-down can be dismissed at any time by pressing the back key or, if no item is selected in the drop-down, by pressing the enter/dpad center key.
The list of suggestions is obtained from a data adapter and appears only if there is any data is available as per the search. For a basic understanding of AutoCompleteTextView, you can read the official document: Link
In Material Design we will be using the custom spinner dropdown menu for our AutoCompleteTextView.
Let’s dive into code to understand the AutoCompleteTextView with material design.
- Add the material design dependency on build.gradle(app):
123456789101112android {...dataBinding {enabled = true}}dependencies {...implementation 'com.google.android.material:material:1.1.0'}
I have enabled the data binding for the example. If you don’t know about the data binding you can read from this link. - Add the material style on the style.xml file:
123456789101112131415161718192021222324252627<resources><!-- Base application theme. --><style name="AppTheme" parent="Theme.MaterialComponents.Light.DarkActionBar"><item name="colorPrimary">@color/colorPrimary</item><item name="colorPrimaryDark">@color/colorPrimaryDark</item><item name="colorAccent">@color/colorAccent</item><item name="cardViewStyle">@style/CardView.Light</item></style><style name="CustomDropDownTilStyle" parent="Widget.MaterialComponents.TextInputLayout.OutlinedBox.ExposedDropdownMenu"><item name="android:layout_width">match_parent</item><item name="android:layout_height">wrap_content</item><item name="android:textColorHint">#9797A2</item><item name="hintTextColor">@color/colorAccent</item><item name="boxStrokeColor">@color/colorAccent</item><item name="colorControlNormal">@color/colorAccent</item><item name="colorControlActivated">@color/colorAccent</item><item name="colorControlHighlight">@color/colorAccent</item><item name="boxCornerRadiusBottomEnd">3dp</item><item name="boxCornerRadiusBottomStart">3dp</item><item name="boxCornerRadiusTopEnd">3dp</item><item name="boxCornerRadiusTopStart">3dp</item></style></resources>
Mainly we will be using the CustomDropDownTilStyle for the TextInputLayout style and its parent is ExposedDropdownMenu. - Now the design part on the activity layout page.
1234567891011121314151617181920212223242526272829303132333435<?xml version="1.0" encoding="utf-8"?><layout><androidx.appcompat.widget.LinearLayoutCompat xmlns:android="http://schemas.android.com/apk/res/android"xmlns:app="http://schemas.android.com/apk/res-auto"xmlns:tools="http://schemas.android.com/tools"android:layout_width="match_parent"android:layout_height="match_parent"android:orientation="vertical"tools:context=".MainActivity"><com.google.android.material.textfield.TextInputLayoutstyle="@style/CustomDropDownTilStyle"android:layout_margin="8dp"android:hint="@string/animals"><androidx.appcompat.widget.AppCompatAutoCompleteTextViewandroid:id="@+id/animal_actv"android:layout_width="match_parent"android:layout_height="wrap_content"android:focusable="false"android:inputType="none" /></com.google.android.material.textfield.TextInputLayout><TextViewandroid:layout_width="match_parent"android:layout_height="match_parent"android:text="@string/auto_complete_text_view_example"android:gravity="center"android:textStyle="bold"android:textSize="18sp"/></androidx.appcompat.widget.LinearLayoutCompat></layout>
On the activity layout, we have used the style attribute on the TextInputLayout which acts as a drop-down menu. - Last but not the least coding part in MainActivity.kt file:
12345678910111213141516171819202122232425262728293031class MainActivity : AppCompatActivity() {lateinit var mContentViewBinding : ActivityMainBindingoverride fun onCreate(savedInstanceState: Bundle?) {super.onCreate(savedInstanceState)mContentViewBinding=DataBindingUtil. setContentView(this,R.layout.activity_main)setupAutoCompleteView()}private fun setupAutoCompleteView() {val animalList=getAnimalList()val adapter: ArrayAdapter<String> = ArrayAdapter<String>(this,android.R.layout.simple_spinner_item,animalList )mContentViewBinding.animalActv.setAdapter(adapter)mContentViewBinding.animalActv.onItemClickListener =AdapterView.OnItemClickListener { parent, arg1, position, id ->//TODO: You can your own logic.}}private fun getAnimalList(): ArrayList<String> {val animalList=ArrayList<String>()animalList.add("dog")animalList.add("cat")animalList.add("cow")animalList.add("elephant")animalList.add("snake")return animalList}}
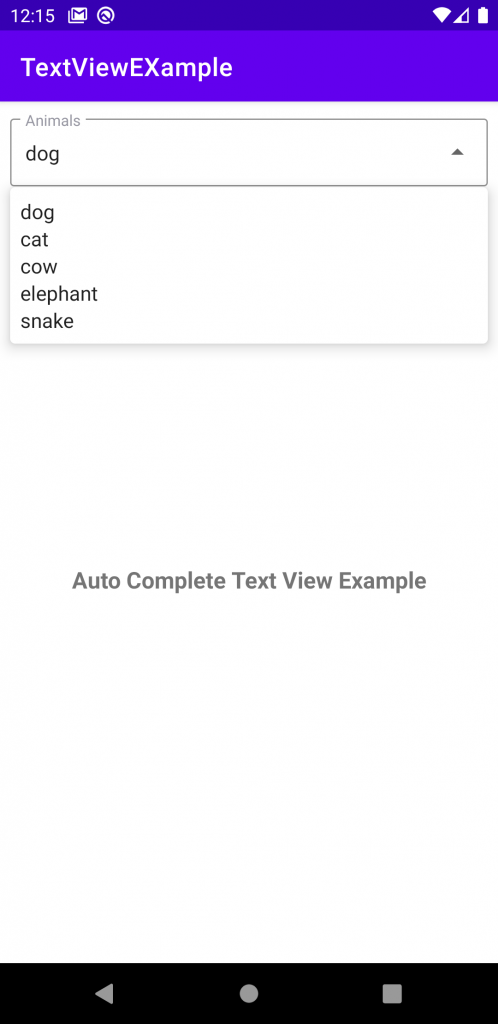
In the MainActivity.kt file we have used a list of animals to be used as dummy data (you can change the data as per your need) the custom adapter for out drop-down menu. To set the selected item on ourAutoCompleteTextView we are getting the name from position selected from onItemClickLister.
The Design Looks like this:
. . . . . . . . . .
That’s it from my side for today, thanks for reading it until now.
