

Creating 9 patch PNG image (i.e .9.png image) is very easy but only few of us knows about it. Start with a PNG image, put it in any drawable folder in your project. Now follow the bellow mentioned steps.
Steps For converting PNG to 9 Patch PNG
- Rename your image file by right-click then Refactor > Rename and change the extension from .png to .9.png .
- Now as you will open the file you will see a window as

- On hovering over the icon you will see the vertical and horizontal lines. Drag and set these lines to set the part of the image which will stretch when views length increases like , ( you can zoom in and out for a clear view)
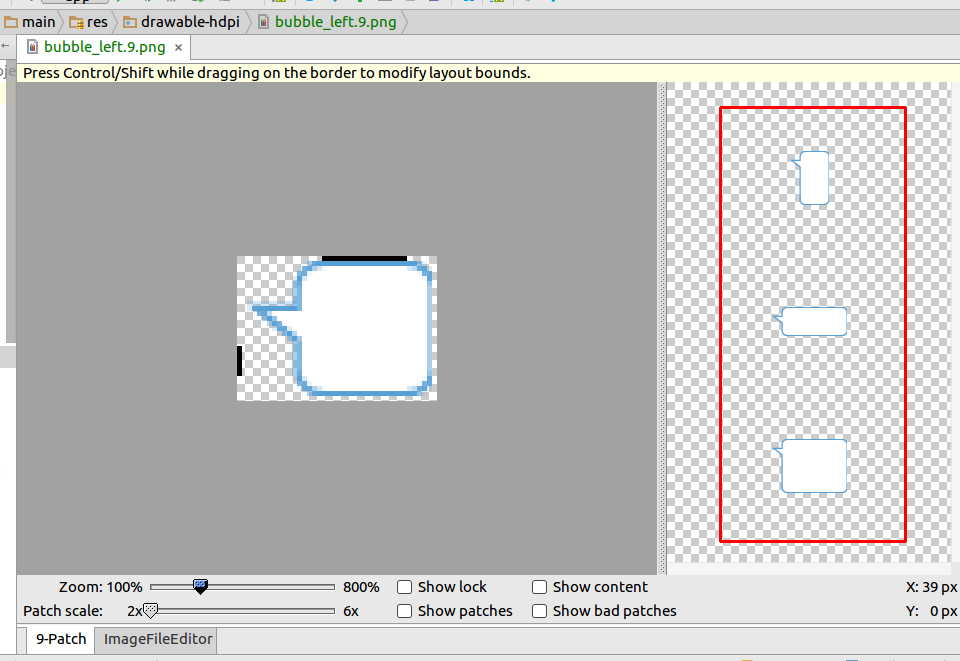
- The black lines in 5the above image shows the area to be stretched. You can also see the preview in the right side (marked in red box).
- And voilà!! You are ready to go.