In this blog, we will learn how to build an AR app in Flutter.
Introduction
An AR App in Flutter places digital objects inside the live camera view. It helps users interact with 3D content in their surroundings.
This project uses AR Flutter Plugin Plus to detect horizontal planes, anchor a remote GLB model, and support rotation and pinch-to-zoom gestures.
The tutorial covers Flutter dependencies and the required Android and iOS settings. It then explains the complete placement and transformation flow.
Before starting, explore more Flutter tutorials on Mobikul.

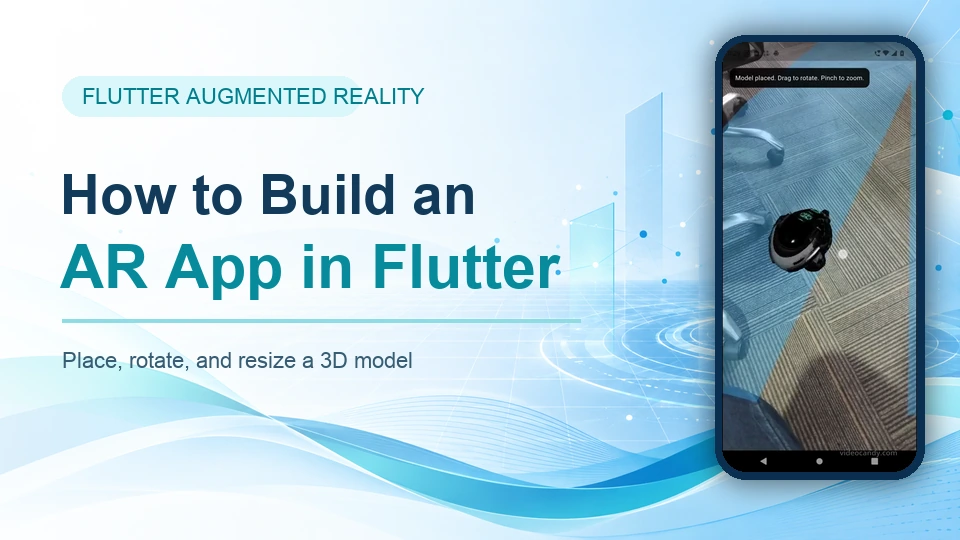
Requirements for an AR App in Flutter
Therefore, use a physical Android or iOS device with augmented-reality support. The app needs camera access, internet access, and enough light to detect surfaces.
For Android testing, confirm your phone appears in Google’s ARCore supported-device list. An emulator may not reproduce the complete camera experience.
Add Flutter AR Dependencies
First, the project uses AR Flutter Plugin Plus for the AR session. In addition, vector_math creates scale and rotation vectors.
File path: pubspec.yaml
|
1 2 3 4 5 |
dependencies: flutter: sdk: flutter ar_flutter_plugin_plus: ^1.1.3 vector_math: ^2.2.0 |
Run flutter pub get after saving the file. You can also review the AR Flutter Plugin Plus package for platform notes.
Configure AR on Android
First, Android needs camera and internet permissions. In addition, the AR camera feature and ARCore metadata mark augmented reality as a required capability.
File path: android/app/src/main/AndroidManifest.xml
|
1 2 3 4 5 6 7 8 9 10 11 12 13 14 15 16 |
<manifest xmlns:android="http://schemas.android.com/apk/res/android" xmlns:tools="http://schemas.android.com/tools"> <uses-permission android:name="android.permission.CAMERA" /> <uses-permission android:name="android.permission.INTERNET" /> <uses-feature android:name="android.hardware.camera.ar" android:required="true" /> <application> <meta-data android:name="com.google.ar.core" android:value="required" tools:replace="android:value" /> </application> </manifest> |
Next, set the minimum Android SDK to 24. This setting matches the platform requirement used by the verified project.
File path: android/app/build.gradle.kts
|
1 2 3 4 5 6 |
android { defaultConfig { minSdk = 24 targetSdk = flutter.targetSdkVersion } } |
Configure AR on iOS
Similarly, iOS needs a clear camera usage message. Moreover, the ARKit capability prevents installation on unsupported devices.
File path: ios/Runner/Info.plist
|
1 2 3 4 5 6 7 |
<key>NSCameraUsageDescription</key> <string>Camera access is required to place 3D models in augmented reality.</string> <key>UIRequiredDeviceCapabilities</key> <array> <string>arkit</string> </array> |
Therefore, the project targets iOS 15 and enables the camera permission definition for its pods. Add these values to the existing Podfile configuration.
File path: ios/Podfile
|
1 2 3 4 5 6 7 8 9 10 11 12 13 14 |
platform :ios, '15.0' post_install do |installer| installer.pods_project.targets.each do |target| flutter_additional_ios_build_settings(target) target.build_configurations.each do |config| config.build_settings['IPHONEOS_DEPLOYMENT_TARGET'] = '15.0' config.build_settings['GCC_PREPROCESSOR_DEFINITIONS'] ||= [ '$(inherited)', 'PERMISSION_CAMERA=1', ] end end end |
Create the AR App in Flutter
First, the main screen starts a horizontal-plane AR session. Then, a tap anchors and loads a remote GLB model on a detected plane.
Next, a one-finger drag rotates the model. Meanwhile, a two-finger pinch changes its size within a safe range.
File path: lib/main.dart
|
1 2 3 4 5 6 7 8 9 10 11 12 13 14 15 16 17 18 19 20 21 22 23 24 25 26 27 28 29 30 31 32 33 34 35 36 37 38 39 40 41 42 43 44 45 46 47 48 49 50 51 52 53 54 55 56 57 58 59 60 61 62 63 64 65 66 67 68 69 70 71 72 73 74 75 76 77 78 79 80 81 82 83 84 85 86 87 88 89 90 91 92 93 94 95 96 97 98 99 100 101 102 103 104 105 106 107 108 109 110 111 112 113 114 115 116 117 118 119 120 121 122 123 124 125 126 127 128 129 130 131 132 133 134 135 136 137 138 139 140 141 142 143 144 145 146 147 148 149 150 151 152 153 154 155 156 157 158 159 160 161 162 163 164 165 166 167 168 169 170 171 172 173 174 175 176 177 178 179 |
import 'package:ar_flutter_plugin_plus/ar_flutter_plugin_plus.dart'; import 'package:ar_flutter_plugin_plus/datatypes/config_planedetection.dart'; import 'package:ar_flutter_plugin_plus/datatypes/hittest_result_types.dart'; import 'package:ar_flutter_plugin_plus/datatypes/node_types.dart'; import 'package:ar_flutter_plugin_plus/managers/ar_anchor_manager.dart'; import 'package:ar_flutter_plugin_plus/managers/ar_location_manager.dart'; import 'package:ar_flutter_plugin_plus/managers/ar_object_manager.dart'; import 'package:ar_flutter_plugin_plus/managers/ar_session_manager.dart'; import 'package:ar_flutter_plugin_plus/models/ar_anchor.dart'; import 'package:ar_flutter_plugin_plus/models/ar_hittest_result.dart'; import 'package:ar_flutter_plugin_plus/models/ar_node.dart'; import 'package:flutter/material.dart'; import 'package:vector_math/vector_math_64.dart' show Vector3; void main() => runApp(const MyApp()); class MyApp extends StatelessWidget { const MyApp({super.key}); @override Widget build(BuildContext context) { return const MaterialApp( debugShowCheckedModeBanner: false, home: ArDemoPage(), ); } } class ArDemoPage extends StatefulWidget { const ArDemoPage({super.key}); @override State<ArDemoPage> createState() => _ArDemoPageState(); } class _ArDemoPageState extends State<ArDemoPage> { static const _modelUrl = 'https://raw.githubusercontent.com/KhronosGroup/glTF-Sample-Models/' 'main/2.0/DamagedHelmet/glTF-Binary/DamagedHelmet.glb'; ARSessionManager? _session; ARObjectManager? _objects; ARAnchorManager? _anchors; ARNode? _node; bool _placing = false; double _rotationX = 0; double _rotationY = 0; double _scaleAtGestureStart = 0.2; String _message = 'Move the phone slowly to find a flat surface.'; @override void dispose() { _session?.dispose(); super.dispose(); } @override Widget build(BuildContext context) { return Scaffold( body: Stack( children: [ ARView( onARViewCreated: _onArViewCreated, planeDetectionConfig: PlaneDetectionConfig.horizontal, ), if (_node != null) Positioned.fill( child: GestureDetector( behavior: HitTestBehavior.opaque, onScaleStart: (_) { _scaleAtGestureStart = _node?.scale.x ?? 0.2; }, onScaleUpdate: _transformModel, ), ), SafeArea( child: Padding( padding: const EdgeInsets.all(16), child: DecoratedBox( decoration: BoxDecoration( color: Colors.black87, borderRadius: BorderRadius.circular(12), ), child: Padding( padding: const EdgeInsets.all(12), child: Text( _message, style: const TextStyle(color: Colors.white), ), ), ), ), ), ], ), ); } void _onArViewCreated( ARSessionManager session, ARObjectManager objects, ARAnchorManager anchors, ARLocationManager location, ) { _session = session; _objects = objects; _anchors = anchors; session.onInitialize(showPlanes: true); objects.onInitialize(); session.onPlaneOrPointTap = _placeModel; } Future<void> _placeModel(List<ARHitTestResult> results) async { if (_placing || _node != null) return; final planeHits = results.where( (result) => result.type == ARHitTestResultType.plane, ); if (planeHits.isEmpty) { _setMessage('No plane here. Keep scanning and tap a detected surface.'); return; } _placing = true; _setMessage('Loading model...'); final anchor = ARPlaneAnchor( transformation: planeHits.first.worldTransform, ); final anchorAdded = await _anchors?.addAnchor(anchor) ?? false; if (!anchorAdded) { return _placementFailed('Could not create an anchor.'); } final node = ARNode( type: NodeType.webGLB, uri: _modelUrl, scale: Vector3.all(0.2), ); final nodeAdded = await _objects?.addNode(node, planeAnchor: anchor) ?? false; if (!nodeAdded) { _anchors?.removeAnchor(anchor); return _placementFailed('Could not load the 3D model.'); } _node = node; _placing = false; _setMessage('Model placed. Drag to rotate. Pinch to zoom.'); } void _transformModel(ScaleUpdateDetails details) { final node = _node; if (node == null) return; if (details.pointerCount == 1) { _rotationX = (_rotationX + details.focalPointDelta.dy * 0.01) .clamp(-1.5, 1.5) .toDouble(); _rotationY += details.focalPointDelta.dx * 0.01; node.eulerAngles = Vector3(_rotationX, _rotationY, 0); } else { final size = (_scaleAtGestureStart * details.scale) .clamp(0.05, 0.8) .toDouble(); node.scale = Vector3.all(size); } } void _placementFailed(String message) { _placing = false; _setMessage(message); } void _setMessage(String message) { if (mounted) setState(() => _message = message); } } |
How AR Placement Works
First, the camera scans for horizontal planes. Then, a tap returns hit-test results from the detected environment.
The code accepts a plane result and creates an anchor at its world transform. It attaches the GLB node only after the anchor succeeds.
Moreover, the app blocks duplicate placement while a model is loading. Clear messages explain scanning, loading, success, and failure states.
Run the AR App in Flutter
Finally, connect a supported physical device and run flutter run. Then, allow camera access when the operating system displays its permission prompt.
Move the phone slowly until a surface appears. Next, tap the surface, drag with one finger, and pinch with two fingers.
However, if placement fails, check lighting, network access, and device support. Also confirm that the remote GLB URL is reachable.
Here is the Output of the Project
Flutter AR App Output
The video shows the 3D helmet placed on a detected surface. It also demonstrates rotation and pinch-to-zoom interactions on a physical device.

Conclusion
In conclusion, you built an AR App in Flutter with plane detection, model placement, rotation, and scaling. The same structure can support other GLB models.
For more mobile-development guidance, browse the Mobikul blog.
Thanks for reading this blog.
Please check my other blogs here.
Read more Flutter blogs