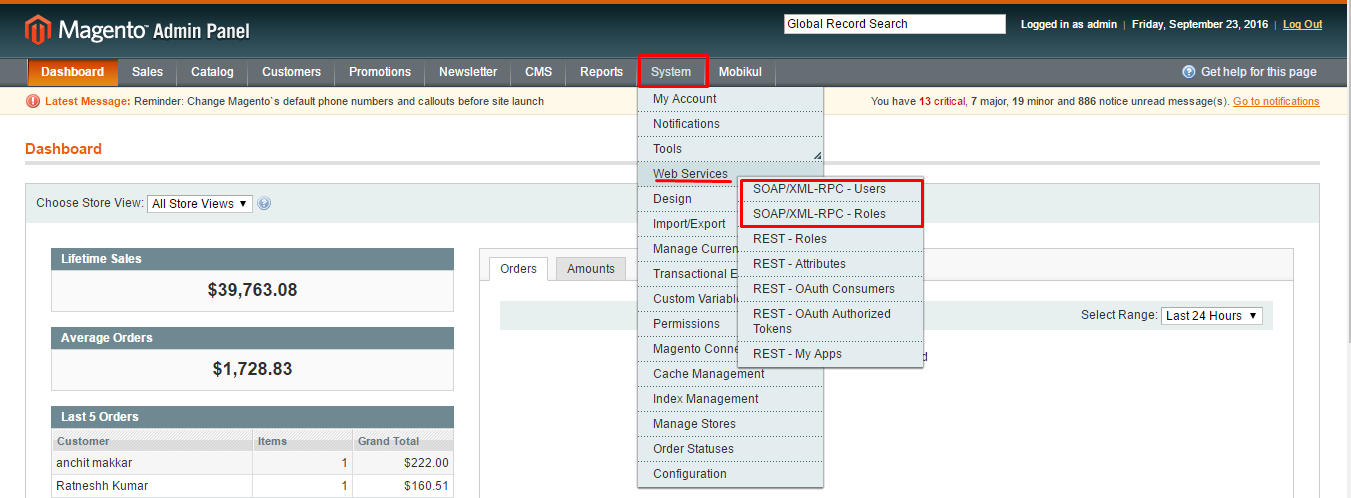
You can easily understand about the API User Name and password in the following process:-
1. First, how to create a role for the API User ?
In the Admin panel, Under System, select Web Sevices > SOAP/XML -RPC – Roles. (as you can see in the above image) Then you will be redirected to the Roles Page where you can see the existing roles. Here you can create the new role for the API user. As you can see in the below image.
When you will click on the Add New Role then you will be redirected to “Add New Role” page as you can see in the below image.
Here you need to create a role name –
In the Role Name, choose a role name for API User
In the Current Admin Password, enter the admin password
After this, click on the “Role Resources” section where you need to give the resources access to the API User. Either you can select All or can give the custom access to the API User and click on the Save Role.
2. Second, How to create API User for the role that you have created in the first process ?
In the Admin, Under System, select Web Services > SOAP/XML-RPC-Users.
Then you will be redirected to the Users page where you can see the existing users of different roles. As you can see in the below image. Here you can add the new user for the role that you created in the first process.
When you will click on the Add New User then you will be redirected to “New User” page as you can see in the below image.
In the User info section, you need to fill the account information as explained below –
In the User Name, create a username (this username we called as API User Name)
In the First Name, enter the first name of User
In the Last Name, enter the last name of User
In the Email, enter a valid email ID of the User
In the Current Admin Password, enter the admin password
In the API Key, choose a password for the new user (this API Key we called as API User Password)
In the API Key confirmation, enter the same password for confirmation
In the This account is, select the status of Active or Inactive
In the User Role section, select the Role that you have created in the first process for this user and save the user by clicking on the Save User tab. As you can see in the below image.
NOTE: The UserName and API Key that you have seen in the second process is the API Username and API password. Now you can easily create the User Name and Password with the User Role.
For more information contact us at https://mobikul.com/contact/

